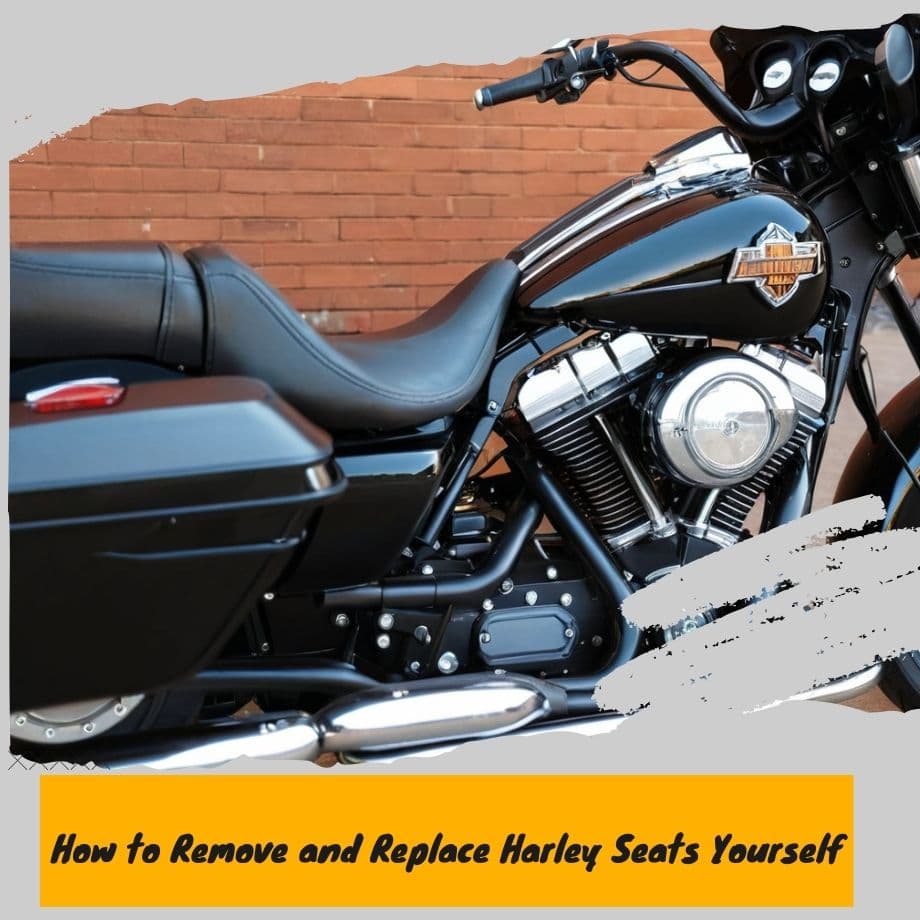
Unbolt Your Passenger: How to Remove and Replace Harley Seats Yourself

Whether you’re tweaking your Softail, Sportster, or Touring model, we’ve got you covered with step-by-step instructions to ensure your seat fits perfectly—boosting comfort and ensuring safety.
In this guide, we'll walk you through the essential tools you'll need and outline safety precautions to take as you switch out or customize your Harley seat. You'll learn how to securely install and remove seats, giving you the freedom to enhance your ride or access critical components underneath.
Ready to get hands-on? Whether you're just starting out or you’re a seasoned pro in the garage, this guide will make sure you’re equipped to handle your Harley’s seat like a boss.
Plus, we’ll throw in some pro tips for troubleshooting common seat-related challenges, ensuring your ride is as smooth as your style. Let's gear up and get your Harley set for the road!
Safety Precautions
When engaging in maintenance tasks on your Harley-Davidson motorcycle, it is imperative to adhere to safety precautions to avert potential harm or damage. Here are some salient recommendations:
- Power down the engine and extract the key. Before beginning any work on your motorcycle, make sure to completely deactivate the engine to prevent accidental activation or contact with moving components.
- Stabilize the motorcycle. Use a motorcycle lift stand, center stand, or blocks to firmly support the bike during maintenance procedures, preventing any tipping mishaps.
- Safeguard the paint and chrome finishes. Mitigate the risk of scratching or denting the paint and chrome by utilizing towels or rags as protective padding when disassembling or installing seats. Exercise caution to prevent tools or hardware from accidentally dropping on the motorcycle.
- Employ appropriate tools. Invest in high-quality tools specifically crafted for motorcycle disassembly to avoid stripping bolts or hardware. While hex keys, torx bits, and wrenches are essential tools, it's not advisable to improvise with household tools.
- Allocate ample workspace. Ensure that there is enough space around the motorcycle to allow for easy maneuvering of tools and components. A clutter-free workspace mitigates the likelihood of errors.
Devoting attention to safety protocols not only streamlines the maintenance process but also averts costly damage to your Harley. Furthermore, it safeguards against potential injuries stemming from hot exhaust pipes, weighty components, or sharp edges.
Tools Needed
Removing and installing a Harley-Davidson seat requires just a few common tools that most riders will have handy. Here's a list of what you'll need:
Combination wrenches: You'll need a set of metric wrenches to remove and install the seat bolts. Typically, 10mm, 13mm, and 15mm wrenches cover most Harley models.
Ratchets and sockets: A 3/8" drive ratchet with a matching metric socket set will make quick work of the seat bolts. The ratchet provides better leverage and speed than using just wrenches.
Hex key set: Many Harleys use hex-head bolts to secure parts of the seat assembly. Have a set of metric hex keys ready. Common sizes are 4mm, 5mm, and 6mm.
Screwdrivers: A set of Phillips and flat-blade screwdrivers can come in handy if your particular model has any screws that need removing.
Pliers: Needle nose and standard pliers help grip and turn fasteners in tight spaces.
Torque wrench (optional): For proper reassembly, you'll want to torque the seat bolts back to the factory spec. A torque wrench ensures you don't over or undertighten.
Protective gloves: Leather gloves will shield your hands from abrasions and pinches while you wrestle with the seat.
These are all cover the basic tools you'll need. Gather your metric wrench set, sockets, hex keys, and a screwdriver set to effortlessly remove and install that Harley seat.
Removing the Seat
You can easily remove the seat from a Harley-Davidson motorcycle in just a few minutes. Here are the step-by-step instructions for Harley seat removal:
STEP1: Locate the seat latch
On most Harley models, you'll find a latch underneath the rear of the seat. You may find it centered or off to one side.

STEP2: Release the latch
Lift the latch, and the seat should release so you can lift it up. Sometimes you may need to rock the seat back and forth while lifting the latch.

STEP3: Lift the seat up
Release the latch and lift the rear seat off the frame. Sometimes it can stick if it's been on there a while, so give it some force.

STEP4: Disconnect the wiring
If your bike has any wiring running to the seat, such as a backrest or rider's backpad, disconnect those wires. There will be plugs that disconnect easily.

STEP5: Remove the seat
Lift the seat up and off the frame. For some models, you may need to slide the seat back first before lifting it up.

Tips for easy removal:
- Ensure that your bike is on level ground to prevent the seat from becoming stuck.
- To break it free, rock the seat back and forth while lifting the latch.
- For heavy seats, lift with your legs and both hands. Don't strain your back.
- If you're working on wiring, disconnect the negative battery cable.
- Before removal, take pictures so you know how to reconnect the wiring.
- When removing them, clean the fender and seat area.
Removing Seats on Different Harley Models
Harley Softail Seat Removal: Step-by-Step Guide
Removing the seat from your Harley Softail is a straightforward process, but it requires attention to detail to ensure you don't damage any components. Follow these simple steps for a smooth Harley Softail seat removal:
-
Prepare Your Tools
To remove the seat from a Harley Softail, you'll need a few basic tools:- A screwdriver (typically a Phillips or Torx, depending on your model)
- A socket wrench set (usually for the seat bolt under the fender)
-
Locate the Seat Bolts
The Harley Softail seats are usually secured by two bolts. One is typically found at the rear of the seat, underneath the fender, and the other one may be located at the front or on the side. -
Remove the Passenger Seat (if applicable)
If your Softail has a passenger seat, remove it first. Unscrew the bolts securing the passenger seat and gently lift it off. -
Loosen the Main Seat
Next, use your screwdriver or socket wrench to unscrew the main seat bolt located near the rear fender. Be sure to store the bolt safely for reinstallation. -
Disconnect Electrical Connections (if applicable)
Some Harley Softail models have electrical connections under the seat for accessories like heated seats. Carefully disconnect these to avoid any damage. -
Lift the Seat Off
Once all the bolts are removed and any electrical connections are disconnected, gently lift the seat off the frame. Be cautious of the seat bracket to avoid scratching your paintwork. -
Reinstallation
To reinstall the seat, follow these steps in reverse order. Ensure the seat is securely bolted in place and that any electrical connections are properly reattached.
How to Remove Sportster Seat: Quick and Easy Steps
Removing the seat from a Harley Sportster is a quick and simple process. Start by locating the seat screw, typically found at the rear of the seat near the fender.
Use a Phillips screwdriver or a socket wrench to remove this screw. Once the screw is out, slide the seat back to detach it from the front bracket.
If your Sportster has a passenger seat, you’ll need to remove it first by unscrewing any additional bolts.
With the seat removed, you can now access the bike’s battery or make any necessary modifications.
Road Glide Seat Removal: A Simple Guide
Removing the seat on a Harley Road Glide is straightforward and similar to other models. Start by locating the seat bolts, which are usually found at the rear of the seat near the fender.
Use a Phillips screwdriver or a socket wrench to remove these bolts. Depending on your model, you might also need to remove a passenger seat or backrest first.
After the bolts are out, gently lift the seat upwards and backward to disengage it from the front mounting tab.
Be careful when lifting to avoid damaging any electrical connections, such as those for heated seats.
Reinstalling the seat is just as simple—follow the same steps in reverse, making sure the seat is securely bolted back into place.
Installing a Solo Seat
Installing a solo seat on your Harley-Davidson motorcycle is a relatively straightforward process, but there are a few key steps to follow.
Prep Work
Before installing your new solo seat, you'll want to remove the existing seat. Refer to the section above on removing the Harley seat. It's also a good idea to have your owner's manual handy for reference.
Make sure the solo seat you purchased is compatible with your bike's make and model year. Solo seats serve as a replacement for the rear section of a two-up seat.
You May Also Like: HARLEY DAVIDSON SEAT COMPATIBILITY CHART
Gather any tools you'll need, such as hex wrenches or Torx bits, to remove bolts. If the solo seat does not come with mounting hardware, you may need to purchase it separately.
Step-by-Step Installation
- Remove the stock rear seat section per the steps outlined earlier. If the rear mounting bracket remains attached, detach it.
- Thoroughly clean the fender where the solo seat will be mounted. Remove any dirt, debris, or old adhesive.
- Test fit the solo seat to ensure proper alignment before adhering. Mark the bolt holes if needed.
- Adhesive remover or promoter should be applied to the fender and solo seat mounting areas. Follow the adhesive manufacturer's instructions.
- Apply the adhesive and mount the solo seat. Apply even pressure for 1-2 minutes until set.
- Reinstall the rear mounting bracket and bolt the solo seat into place. Tighten bolts to the proper torque specs.
- Before riding, allow the adhesive to fully cure for at least 24 hours. Ascertain the seat's secure mounting.
Enjoy your new solo seat! Be sure to keep it properly maintained.
Adding a Passenger Seat
Installing a passenger seat on a Harley-Davidson necessitates some preparation and careful follow-through with the installation steps.
Prep Work
Before installing the passenger seat, you'll want to:
- Remove the existing solo seat
- Clean the fender and mounting area thoroughly, removing any debris or corrosion
- Inspect the fender and seat mount for any damage or stress cracks
- Obtain the correct mounting hardware for the passenger seat
Step-by-Step Installation
Follow these steps to properly install your new Harley passenger seat:
- Set the new passenger seat in place on the fender mount. Align the seat bracket with the fender holes.
- Install the rear mount bolt through the fender and seat bracket. Thread the nut loosely, without tightening it yet.
- Insert the front mount bolts through the front of the seat bracket and into the fender holes. The nuts are loosely threaded.
- Tighten all nuts in an alternating pattern to ensure even contact and prevent cracking. Tighten to factory torque specs.
- Connect any necessary electrical plugs for backrests, heat, or other accessories. Make sure connections are secure.
- Carefully lower the seat into place, rocking it gently to engage the latch. To lock it in place, press down firmly on the seat's rear.
- Verify the seat's secure installation and ensure it doesn't shift or rock. Go for a short test ride to check for any unusual vibrations.
You May Also Curious About : How to Install a Backrest on a Tour Pack
Re-check all hardware after the test ride and tighten if necessary. Enjoy the ride!
Installing the Seat Bolt
Properly installing the seat bolt is crucial to ensuring the seat remains securely fastened. Here are some key steps:
- Use the bolt size specified by the motorcycle manufacturer, usually 1/4"-20. Using the wrong size can lead to stripping or an improperly secured seat.
- Apply a drop of blue threadlocker to the threads before installing. This helps prevent vibration from loosening the bolt.
- Tighten the bolt to the correct torque specification, typically around 15 ft-lbs. Overtightening can damage the mounting points or bolts; undertightening allows movement, leading to failure. Use a torque wrench to ensure proper torque.
- Check that the seat fits flush against the frame. Insert and remove the bolt to verify smooth operation with no binding. Binding suggests a misalignment.
- After installing, wiggle the seat and try lifting it up to confirm it is fully secured. There should be no movement or looseness.
- Periodically check the torque specification and inspect for wear, replacing worn bolts. A loose seat bolt is a safety hazard.
- Proper bolt selection, torque, fitment, and ongoing inspection ensure the seat remains firmly attached for the rider's safety. Taking the time to correctly install the seat bolt helps avoid issues down the road.
Troubleshooting
Removing and installing a Harley Davidson seat can sometimes run into issues. Here are some common problems and solutions:
Seat won't come loose
Often, a stuck seat latch prevents the removal of the seat. Try jiggling the seat back and forth while lifting up. You can also try spraying a lubricant like WD-40 into the latch mechanism.
Bolts are stuck
Over time, especially if exposed to moisture, the bolts can become rusted in place. Use penetrating oil and let it soak in for 10–15 minutes. You may need a breaker bar or impact wrench to loosen the bolts.
Seat doesn't align properly
When re-installing the seat, it may not sit completely flush or be uneven. Double check that the rear latch is fully engaged. You can loosen the front bolts to adjust the alignment and then re-tighten them.
Seat wobbles
If the solo or passenger seat is unstable, the likely cause is loose bolts. Tighten down all of the mounting bolts evenly. If the threads sustain damage, you might require new bolts.
Electrical connection issues
For seats with wiring harnesses, the connector may get damaged or corroded. Inspect the connector and clean the contacts. You may need to replace the connector or wiring harness if it's too degraded.
New seat doesn't fit right
When installing a new aftermarket seat, it may not be an exact fit for your bike's model and year. You may need to modify or adapt parts of the seat for proper installation. Consult with the manufacturer.
Paint damage
When removing the seat, you can inadvertently scratch or chip the paint around the mounting area. Use touch up paint to fix any cosmetic issues. When working, make sure to tape off the affected area to prevent any potential damage.
Maintenance
Proper maintenance is key to keeping your Harley Davidson seat looking good and functioning properly for years to come.
Keeping Seats Protected
Harley-Davidson seats can be susceptible to cracking and fading from UV exposure. Use a UV protectant spray or lotion specifically made for vinyl and leather to protect the seat material from sun damage. Reapply as needed, especially after cleaning the seat.
Consider covering the seat of your motorcycle when parked outside to prevent sun damage. Use a fitted motorcycle seat cover or a breathable cloth cover to allow moisture to evaporate.
Cleaning Tips
- For vinyl seats, use a vinyl cleaner and protectant made specifically for motorcycles. Harley Davidson recommends their Vinyl Finish Cleaner and Protectant.
- For leather seats, use a pH balanced leather cleaner and conditioner. Avoid using vinyl cleaners on leather, as they can dry out the material.
- For cloth seats, vacuum regularly with a soft brush attachment and spot clean stains immediately with an upholstery cleaner.
- Always do a test spot with any new cleaning product in an inconspicuous area first.
- Wipe down seats with a microfiber cloth after each ride to prevent dirt buildup.
- Avoid using harsh chemicals like bleach, acetone, or other solvents.
- Don't use abrasive cleaners or scrub brushes that can damage the seat surface.
- Make sure the seat is completely dry before reinstalling and riding to prevent water damage.
- Properly maintaining your Harley Davidson seat will help it last for many miles down the road.
Sum Up
Installing or removing a seat on a Harley-Davidson motorcycle is an important process that requires care and attention to detail. Following the proper steps for your specific model is crucial, as is using the correct tools and taking appropriate safety precautions.
To summarize, key steps involve removing body panels or covers to access the seat mounting hardware, detaching electrical connections, removing seat bolts or brackets, lifting the seat off, and reversing this process for installation. To prevent overtightening, use torque specifications.
Remove all passenger footrests, handles, and hardware from solo seats. Passenger seats may need hoses and cables re-routed. You must properly align and tighten the seat bolt.
Installing the seat securely and safely requires careful attention to detail. Riding with a loose seat can be hazardous. We advise periodically checking the tightness of the seat hardware. Proper seat installation contributes to riding comfort and satisfaction.


Leave a comment