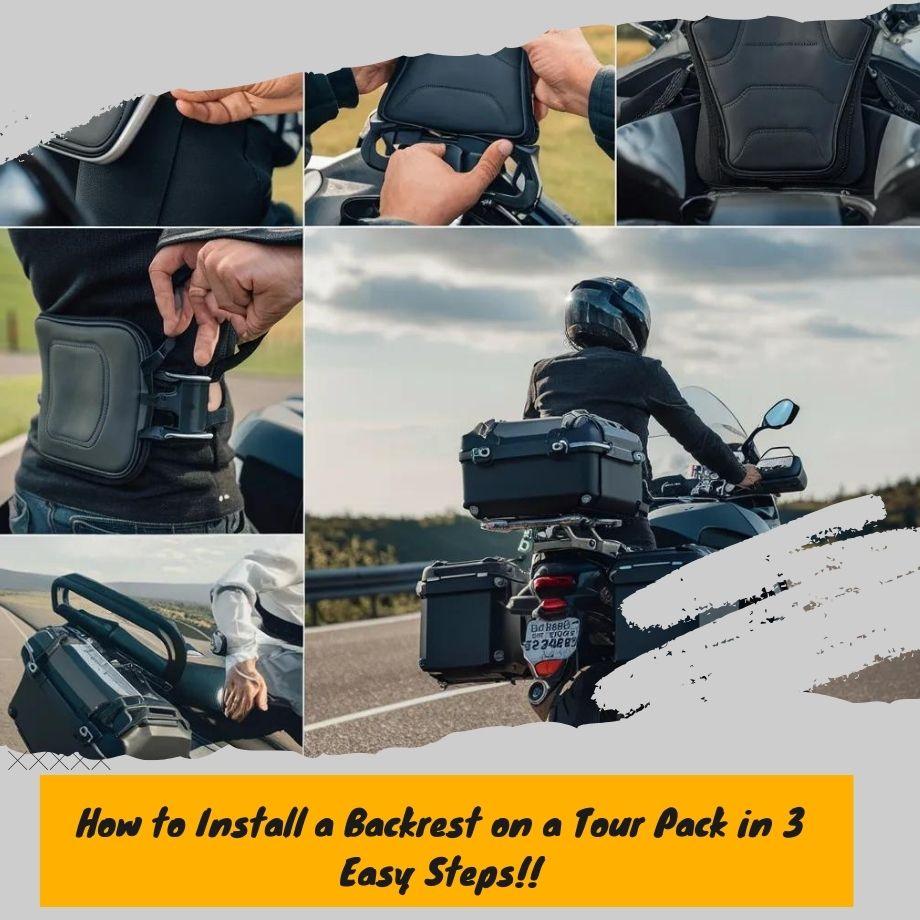
Take a Load Off: Installing a Backrest on Your Tour Pack for Maximum Support and Comfort
Benefits of Installing a Backrest
Installing a backrest on your tour pack offers several significant advantages that can greatly enhance your riding experience, especially during long-distance trips. One of the primary benefits is improved comfort.
Long hours spent on the motorcycle can lead to back pain, muscle fatigue, and discomfort, which can detract from the enjoyment of your ride.
A well-designed backrest provides crucial lumbar support, helping to maintain proper spinal alignment and reducing strain on your lower back muscles.
Moreover, a backrest can significantly reduce fatigue during extended rides. Without proper support, your back muscles have to work harder to maintain an upright position, leading to faster exhaustion.
By transferring some of the weight and pressure onto the backrest, your muscles can relax, allowing you to ride for longer periods without experiencing as much discomfort or tiredness.
In addition to comfort and reduced fatigue, a backrest can also improve your overall riding posture. Maintaining good posture is essential for safe and controlled riding, as it helps you stay alert and responsive.
A backrest encourages you to sit upright, promoting better weight distribution and balance on the motorcycle, which can enhance your control and handling abilities.
Tools and Materials Needed
To install a backrest on your tour pack, you'll need the following tools and materials:
- Backrest kit (compatible with your tour pack model)
- Wrenches or sockets (sizes specified in the backrest kit instructions)
- Screwdrivers (flat-head and Phillips, as needed)
- Torque wrench (optional, but recommended for proper tightening)
- Loctite or thread-locking compound
- Clean rags or shop towels
Make sure you have all the necessary components included in the backrest kit, such as the backrest pad, mounting brackets, hardware (bolts, nuts, washers), and any other specific parts required for your motorcycle model. Having the right tools and materials on hand will ensure a smooth and successful installation process.
It May Interesting to you : WHAT IS A HARLEY TOUR PACK PAD?
Preparing the Tour Pack
Before installing the backrest, you'll need to prepare your tour pack by removing any existing components or accessories that may interfere with the installation process. Here are the steps to follow:
- Remove the tour pack from your motorcycle by unscrewing or unclipping it according to your specific model's instructions.
- If you have a luggage rack or any other accessories mounted on the tour pack, carefully remove them and set them aside.
- Inspect the tour pack's mounting points and ensure they are clean and free from any debris or dirt.
- If your tour pack has a built-in backrest or any other components that need to be removed, consult your owner's manual for the proper removal procedure.
- Once the tour pack is clear of any obstructions, you can proceed with the backrest installation.
You May Wants to Know More: What Is a Harley Tour Pack?
Installing the Backrest Mounting Brackets
The first step in installing a backrest on your tour pack is to properly mount the backrest brackets. These brackets will provide a secure and sturdy base for attaching the backrest later on.
Start by placing the tour pack on a flat, stable surface and locating the pre-drilled holes or mounting points on the top surface.
If your tour pack didn't come with pre-drilled holes, you'll need to carefully mark and drill the holes according to the backrest manufacturer's instructions.
Next, take the backrest mounting brackets and align them with the holes or mounting points on the tour pack. Ensure that the brackets are positioned correctly, following the specific orientation and placement guidelines provided by the manufacturer.
Depending on the design of the brackets and tour pack, you may need to make minor adjustments or use spacers to achieve a proper fit and alignment. It's crucial to get the brackets level and evenly spaced for a secure installation.
Once the brackets are correctly positioned, use the provided hardware (typically bolts, washers, and nuts) to securely fasten them to the tour pack.
Tighten the hardware according to the recommended torque specifications, being careful not to over-tighten or strip the threads.
After tightening the hardware, double-check the alignment and stability of the mounting brackets. They should be firmly attached to the tour pack without any wobbling or movement. If necessary, make any final adjustments to ensure a solid and secure fit.
With the mounting brackets properly installed, you're now ready to proceed to the next step of attaching the backrest itself.
Attaching the Backrest to the Mounting Brackets
- Start by placing the backrest upright on a flat surface. Locate the pre-installed mounting brackets on the backrest.
- Take the provided hardware kit and identify the bolts, washers, and nuts required for attaching the backrest to the mounting brackets.
- Align the mounting holes on the backrest with the corresponding holes on the mounting brackets of your tour pack.
- Insert the bolts through the holes, placing a washer on both sides of the mounting bracket to prevent scratches and ensure a snug fit.
- On the backside of the mounting bracket, secure the bolts with the provided nuts. Hand-tighten them initially.
- Once all bolts are in place, use the appropriate wrench or socket set to tighten the nuts securely, ensuring the backrest is firmly attached to the mounting brackets.
- Double-check that all hardware is tightened properly and that the backrest doesn't wobble or move when applying pressure.
- If applicable, adjust the angle or positioning of the backrest to your desired comfort level by loosening the bolts, repositioning, and re-tightening the hardware.
With the backrest securely attached to the mounting brackets, you've completed a crucial step in enhancing your riding comfort on long tours. Proceed to the next section for any additional adjustments or final touches.
Adjusting the Backrest Height and Angle
Once the backrest is installed on your tour pack, you'll want to adjust it to your desired height and angle for optimal comfort and support during your rides. Most backrest models come with adjustment mechanisms that allow you to customize the positioning.
- First, locate the height adjustment lever, knob, or release button, which is typically located at the base of the backrest or on the mounting bracket. Follow the manufacturer's instructions to unlock the height adjustment mechanism. Gently raise or lower the backrest to your preferred height, ensuring it's positioned at a comfortable level for your back.
- Next, adjust the angle of the backrest. Many models feature a tilt or angle adjustment mechanism, such as a knob or lever on the side or back of the backrest. Unlock the angle adjustment and tilt the backrest forward or backward until you find the most comfortable and supportive angle for your riding position.
- After adjusting the height and angle, ensure the backrest is securely locked in place by tightening any knobs, levers, or release buttons according to the manufacturer's instructions. Double-check that the backrest is firmly secured and won't move or shift during your ride.
It's essential to take the time to properly adjust the backrest to your specific needs and preferences. A well-positioned backrest can significantly improve your riding comfort, reduce fatigue, and provide the necessary support for long journeys on your motorcycle.
Test and Fine-Tune the Backrest Installation
After completing the installation, it's crucial to test the backrest for proper functionality and comfort. Take a short ride and pay attention to how the backrest feels against your back. Ensure that it provides adequate support and doesn't cause any discomfort or strain.
If you notice any issues or areas for improvement, don't hesitate to fine-tune the installation. Here are some tips to help you achieve the perfect fit:
- Adjust the backrest's angle: Most backrest models allow you to adjust the angle to suit your preference. Experiment with different angles to find the most comfortable position for your back.
- Adjust the backrest's height: If the backrest is too high or too low, it can cause discomfort. Adjust the height until you find the sweet spot that provides optimal support for your back.
- Check the backrest's tightness: Ensure that the backrest is securely fastened to the tour pack. If it's too loose, it may shift or move during your ride, causing discomfort. Tighten the mounting hardware as needed.
- Consider adding additional padding: If the backrest feels too firm or uncomfortable, you can add a cushion or padding to soften the surface and enhance your comfort.
Remember, everyone's body is different, so it may take some trial and error to find the perfect backrest setup. Don't be afraid to make adjustments until you achieve the desired level of comfort and support.
Maintaining and Caring for Your Installed Backrest
After successfully installing your backrest on the tour pack, it's essential to maintain and care for it properly to ensure its longevity and optimal performance. Here are some tips to help you keep your backrest in top condition:
**Regular Cleaning**: Wipe down the backrest with a damp cloth and mild soap solution to remove dirt, grime, and debris. Avoid using harsh chemicals or abrasive cleaners, as they can damage the material and finish.
**Inspection**: Periodically inspect the backrest for any signs of wear, cracks, or loose hardware. Tighten any loose bolts or screws, and replace any damaged components immediately to prevent further issues.
**Protection**: If you plan to store your motorcycle for an extended period, consider covering the backrest with a breathable cover to protect it from dust, moisture, and UV rays.
**Lubrication**: Depending on the type of backrest you have, you may need to lubricate the hinges or adjustment mechanisms periodically. Consult your owner's manual or the manufacturer's recommendations for the appropriate lubricant and application instructions.
**Adjustments**: If your backrest is adjustable, ensure that it's properly positioned for your comfort and support. Adjust the backrest as needed, following the manufacturer's guidelines to avoid straining or damaging the adjustment mechanisms.
You May Also Like to know about: HOW TO REMOVE AND REPLACE HARLEY SEATS
Troubleshooting and Addressing Potential Issues
During the installation process, you may encounter a few challenges or issues. It's essential to be prepared and have a plan to address these problems. Here are some common issues and troubleshooting tips:
**Misalignment or Improper Fit**: If the backrest doesn't seem to fit correctly or appears misaligned, double-check your measurements and the installation instructions. Ensure that you've followed the steps precisely and that all components are securely tightened. If necessary, you may need to make minor adjustments or use shims to achieve a proper fit.
**Rattling or Loose Parts**: Over time, vibrations from riding can cause some parts to become loose or rattle. Periodically check the backrest and tighten any loose bolts or hardware. You may also consider applying a thread-locking compound to prevent loosening.
**Discomfort or Poor Support**: If you experience discomfort or find that the backrest isn't providing adequate support, try adjusting the angle or position. Some backrests offer adjustability features that allow you to customize the fit to your preferences. Additionally, you may need to experiment with different cushion types or thicknesses to find the ideal level of support.
**Compatibility Issues**: Before purchasing a backrest, ensure that it's compatible with your specific tour pack model. Consult the manufacturer's specifications or seek guidance from professionals to avoid compatibility problems that could lead to improper installation or potential damage.
**Weathering and Maintenance**: Exposure to the elements can cause wear and tear on the backrest over time. Regularly inspect the backrest for signs of damage, such as cracks, fading, or deterioration. Follow the manufacturer's recommendations for cleaning and maintenance to extend the lifespan of your backrest.
Remember, if you encounter any significant issues or have concerns about the installation process, it's always better to seek professional assistance or consult with experienced riders or mechanics. Proper installation and maintenance will ensure a comfortable and safe riding experience with your new backrest.
Safety Precautions
Installing a backrest on your tour pack can greatly enhance your riding comfort, but it's crucial to prioritize safety throughout the process and while riding with the installed backrest. Here are some important safety considerations:
- Ensure that the backrest is securely fastened to the tour pack and won't come loose during your ride. Double-check all mounting hardware and follow the manufacturer's instructions carefully.
- Position the backrest at the appropriate height and angle to provide support without obstructing your view or interfering with your ability to operate the motorcycle controls comfortably.
- Be mindful of the added weight and potential change in the bike's center of gravity caused by the backrest. Adjust your riding style accordingly, especially when making turns or sudden maneuvers.
- Regularly inspect the backrest and mounting hardware for any signs of wear, loosening, or damage. Replace components as needed to maintain a secure and safe installation.
- If carrying a passenger, ensure that the backrest doesn't interfere with their comfort or safety. Adjust the positioning or consider an alternative backrest solution if necessary.
Remember, your safety and the safety of others on the road should always be the top priority. By following proper installation procedures and exercising caution while riding with the backrest installed, you can enjoy the added comfort while minimizing potential risks.
Summary
Installing a backrest on your tour pack is a relatively straightforward process that can greatly enhance your riding comfort and support.
This comprehensive guide covers all the necessary steps to ensure a proper installation, from gathering the required tools and materials to making the final adjustments.
By following these instructions, you'll be able to enjoy the benefits of a securely mounted backrest that provides crucial lumbar support during long rides.
This simple upgrade can alleviate back pain, improve posture, and reduce fatigue, allowing you to focus on the road ahead and fully immerse yourself in the riding experience.
Don't let discomfort hold you back – invest in a backrest and unlock a whole new level of touring pleasure.


Leave a comment