From Sportsters to V-Stars: A Complete Guide to DIY Batwing Fairing Installation
What is a batwing fairing?
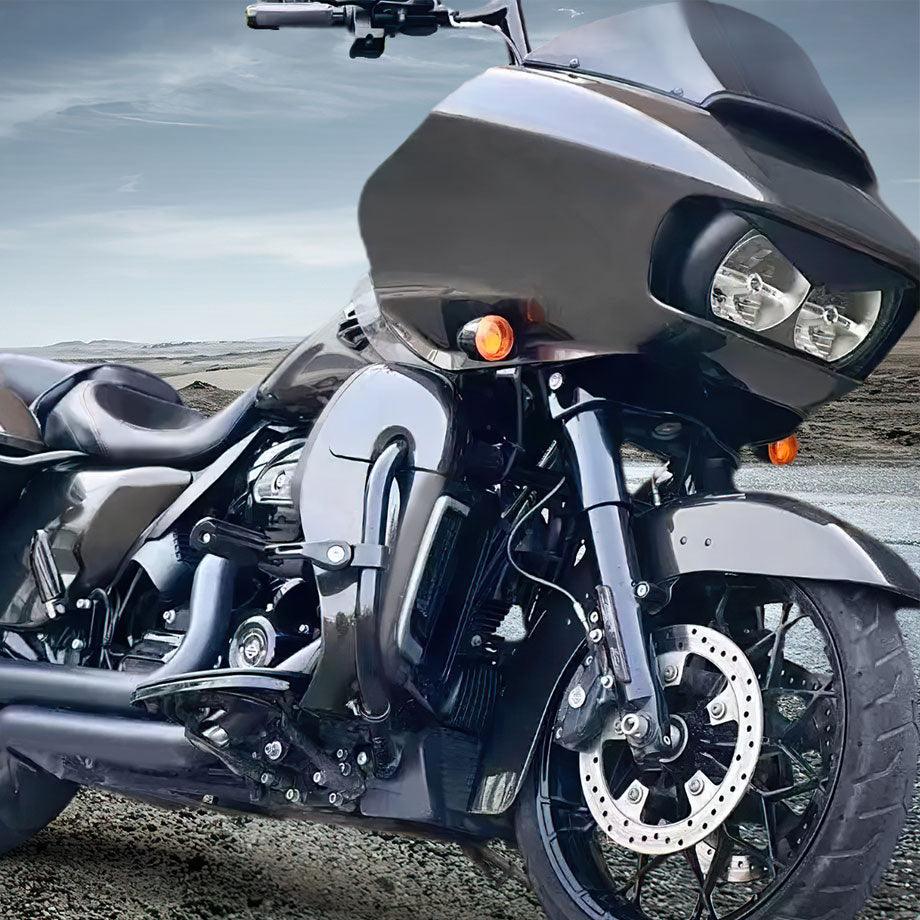
Batwing fairing is a huge, full-coverage fairing that wraps in front of a motorcycle. The batwing fairing derives its name from the bat's wing configuration, which fans out to the sides before tapering forward. Batwing fairings are common on touring bikes and large cruisers.
Below is a list of some of the most well-liked batwing fairing models and brands:
- Memphis Shades Batwing Fairings: Available in a variety of colors and styles. It's extremely popular because of its quality and ease of installation.
- Harley-Davidson Batwing Fairings: Come stock on many Harley touring bikes, including the Road Glide and Street Glide, complete with an integrated radio and speaker system.
- Kuryakyn Batwings: Aftermarket for Harleys and metric cruisers. Variable-designed windscreen and venting options.
Major Benefits to Batwing Fairing:
- Wind protection: Big protectors cut the wind and weather for the rider's body, reducing fatigue during long rides.
- Styling: a custom, sleek look made just for touring bikes, but many riders only put them on for the looks.
- Storage compartment: Some manufacturers design their Harley Davidson fairings with compartments in them to store maps, glasses, electronics, and so on.
- Mounting points for the fitting of accessories like auxiliary lights, GPS, and stereo systems for easy fitment.
Preparing for Installation
Before you start installing the Batwing fairing, there will be some stages that have a preparatory nature involved. Get the table ready with the right tools, and prepare your motorcycle. Also, refer to the installation instructions that you should have read well in advance.
Gather Tools and Supplies
To remove the old hardware and mounting brackets and reinstall the new ones, you'll need basic hand tools like screwdrivers, wrenches, Allen keys, etc.
The fairing kit should come with all the special fasteners or adapters that would need to be fitted to your specific motorcycle model. Have these ready along with things like rags, electrical tape, etc.
Prep the motorcycle
Begin by removing any existing windshield or fairing components that may interfere with the replacement batwing fairing.
Refer to your owner's manual for proper removal procedures. Remove the battery in order to avoid any electrical shorts. Check all mounting locations on the frame to make sure they are clean and free of debris.
Read Instructions
Thoroughly Read the entire instruction manual first before starting with the actual fairing installation to understand all the steps needed. Certain kits require you to follow specific sequences.
Make sure you have the mechanical skills required, or better yet, consider professional help where necessary. Knowledge of the process in advance helps in easy installation.
Mounting the Fairing
One of the most important steps is to attach the mounting brackets and hardware correctly, which will support the fairing properly aligned on your motorcycle.
First, install the lower mounting brackets into the fairing using the supplied bolts. You can find the exact locations of the brackets in your fairing's instructions.
Then position the fairing on the bike's frame. If need be, get someone to help hold it in place.
You May Also Like: INSTALLING A HARLEY REAR FENDER EXTENSION
Put the upper mounting bolts through the fairing and into the frame.
All bolts are hand-tightened before finally being tightened with a wrench.
Slowly release the fairing, ensuring that it rests even and is centered on the bike's windshield frame.
Loosen the bolts if not, then jiggle the brackets until the fairing sits flush. Very carefully ensure that all the bolts for mounting are aligned tight.
Avoid over-tightening, as it may lead to cracking. Push the fairing to either side with a slight force to ensure that it is firm, not loose.
Now, with the Batwing fairing securely mounted, you should move ahead with installing the windshield and other pieces.
Proper installation of the fairing will ensure it stays put while looking great on your bike.
Installing the windshield
Start installing the windshield onto the batwing fairing by securing the windshield hardware. Second, adjust the angle for comfort and visibility.
Attaching the windshield hardware
Metal plates and rubber gaskets, which sandwich the windshield between themselves and the fairing, typically make up windshield hardware.
Place the rubber gaskets in the fairing and align them with the pre-drilled holes.
The outer metal plates were placed, and the holes were aligned through the fairing. Next, we insert the bolts from the outside through the plate and gasket, and then loosely screw them into the inside using the nut. Do not tighten yet.
Angle adjustments
Adjust the windshield's angle for optimal visibility and comfort before tightening everything down.
Straddle the bike, or have someone make the adjustments while you gauge the view. Most will allow a few degrees of tilt in either direction.
Take your time until you get the right angle, and remember that after tightening the nuts and bolts, tighten equally but firmly on both sides.
Over-tightening can crack the windscreen. Test its stability by taking the bike for a ride, making sure the windscreen does not move out of position. Adjust as needed.
Installing Speakers (optional)
Adding speakers to your batwing fairing can enhance your riding experience by allowing you to listen to music on the road. When installing speakers, there are a few key considerations:
Speaker Types and Sizes
- Component speakers generally provide the best sound quality. They separate the woofer and tweeter into different housings to provide clearer highs and lows.
- Coaxial speakers combine the woofer and tweeter into one unit. They are more compact but may not produce as precise sound separation.
- Speaker size depends on the size of your fairing. 4-6-inch speakers are common. Make sure to get speakers that will properly fit the mounting locations.
You May Also Like: SIDE WINGS AIR DEFLECTORS IMPROVE PERFORMANCE
Wiring and Amplifiers
- Run speaker wires from each speaker location back to a central amplifier mounted inside the fairing or frame. Use adequate-gauge wire to prevent power loss.
- A small 2-channel or 4-channel amp works well to power fairing speakers. Seek a motorcycle-specific amp that can withstand vibration.
- Install a power wire from the amp to your bike's battery to turn the system on and off with ignition. Add an in-line fuse for protection.
Mounting Locations
- Most batwing fairings have dedicated speaker pods or cutouts where speakers can be installed. Utilize these for the easiest mounting.
- If not pre-cut, you can create custom speaker mounts. You can adhere fiberglass pods to the interior of the fairing. Or, mount speakers to a panel attached behind cutouts.
- Position speakers evenly spaced within the fairing for balanced stereo sound. They should be angled slightly inward toward the rider.
- Use weatherproof speakers designed for motorcycle use. Seal enclosures to prevent water intrusion.
Connecting the wires
Once the fairing is mounted and the windshield installed, the next step is to connect the wiring. This includes any speakers, lights, or accessories that are part of the fairing.
First, neatly route all the wires from the fairing components and group them together. Use zip ties or adhesive clips to keep the wires organized and in place. Avoid running wires over sharp edges or near hot or moving parts.
Next, locate the power source on the bike and connect the wiring harness. For most Harley models, the fairing wiring can plug into connectors under the seat or near the battery. Refer to the bike's manual for details on tapping into the electrical system.
On other bike models, you may need to locate an accessory power point, battery terminals, or fuse box to connect the positive and negative wires from the fairing. Make sure to use the appropriate connector size, and exercise caution not to short any wires.
Test all connections to confirm speakers, lights, and accessories are getting power. With the wiring neatly routed and connected, the electrical components of the batwing fairing should now be fully operational.
Finishing Touches
It's crucial to apply some finishing touches after mounting the main fairing and components to guarantee proper installation.
Check alignments. Make sure the fairing is centered and aligned evenly with the forks and windshield. Ensure the proper alignment of the windshield, speakers, and other components. Misalignments can cause issues like wind noise or vibration.
Test electronics. If you installed speakers, stereos, or other powered components, thoroughly test them. Make sure the audio works through all speaker channels and volumes. Check that any lighting or accessories function properly.
Add trim pieces. Many batwing fairings have additional chrome trim or accent pieces that snap into place. Make sure to follow the instructions for the secure installation of all exterior trim and components.
Secure all fasteners. Verify the proper tightness of the mounting bolts, screws, and clamps. Loose fasteners can cause issues down the road.
Clean the fairing. Use a soft cloth with plastic cleaner to remove any fingerprints or dirt from the installation process. Make it look showroom-ready.
Taking the time to do these finishing steps helps ensure you have a quality, problem-free installation that will hold up for many miles down the road. A little extra attention to detail goes a long way.

Tips for specific bike models
For Harley-Davidson
Models Many Harley-Davidson models, like Sportsters and Touring bikes, come with detachable batwing fairings from the factory. This makes installing an aftermarket batwing relatively straightforward.
- Make sure to remove the stock fairing entirely before installing the new one. Detach all electrical connections and mounting hardware. The new batwing should bolt directly onto the same mounting points as the OEM fairing using the provided hardware.
- Pay attention to the detachable mechanisms, like quick-release levers or screw-off clamps, and make sure your new fairing can properly utilize the detachable design.
- You may need to drill new holes or modify the mounting points slightly to accommodate the new fairing. Go slow and check the fit as you install.
- For wiring, connect to the same harness plugs and terminals as the factory fairing. The harness should plug right in without modification.
- Test all functions, like lights and turn signals, before final reassembly.
You May Also Like: ICONIC HARLEY-DAVIDSON MODELS WITH FIXED FAIRINGS
For V-Star Models
Installing a batwing on a V-Star presents some clearance challenges around the tank and front suspension components.
- Check carefully for clearance issues between the fairing and tank, triple trees, front shocks, etc.
- Some trimming or spacing modifications may be required to the mounting plates or the fairing itself.
- Cutting or grinding on the bike's frame or tank should be avoided if possible.
- A batwing for a V-Star will sit higher and further back than a Harley fairing. Make sure the look and riding position are acceptable before permanently mounting.
- The V-Star batwing kit should come with custom mounting plates and hardware to work around tight clearances. Follow the directions closely.
- As always, go slowly and test-fit the fairing repeatedly before final mounting. Check headlight aim and turn signals before completing the installation.
Maintenance Keeping
your batwing fairing in good condition requires some ongoing maintenance.
Here are a few key tips:
Keeping Hardware Tight
The vibration from riding can cause screws and bolts on your fairing to loosen over time. It's important to periodically check that all mounting hardware is tight.
Go over all the screws, bolts, and clamps and tighten anything that feels loose. Pay particular attention to the main mounting brackets. Loose hardware can allow the fairing to shake or flutter while riding.
Cleaning and protecting
Regular cleaning will help keep your batwing fairing looking its best. Use mild soap and water to clean the surfaces, avoiding harsh chemical cleaners or abrasives.
After washing, go over the plastic surfaces with a protectant like Back-to-Black or a vinyl or rubber protectant. This will restore any faded black coloring and help protect against UV damage. Avoid products like ArmorAll that leave glossy residues.
For windshields, use a high-quality glass cleaner and a microfiber cloth to avoid scratches. Apply a windshield protectant specifically made for motorcycle use. This will help repel bugs and road grime.
With proper maintenance and care, your batwing fairing will stay looking great for many miles down the road!
Removing or Replacing the Batwing Fairing
Removing and replacing your batwing fairing requires care and patience. Follow these steps for safe removal:
- Disconnect the wiring harness. Locate where the fairing wiring connects to the bike's electrical system, and unplug the harness. Tape up the ends to prevent damage.
- Remove the windshield. Refer to your bike's manual for proper windshield removal. Set it aside with care to avoid scratches.
- Remove fairing hardware. Using the proper tools, take out all screws, bolts, and fasteners attaching the fairing to the bike frame. Keep them organized.
- Detach the fairing. With the hardware removed, gently detach the fairing from the mounting points on the frame. You may need to wiggle it or rock it loose.
- Lift off the fairing. Once fully detached, carefully lift the fairing up and off the bike. Move slowly to avoid hitting other components.
- Store properly. Place the fairing on a soft surface to prevent scratches. Cover it to keep off dust.
When re-installing the batwing fairing, follow these tips:
- Inspect all hardware and electrical components for damage before re-attaching. If needed, replace it.
- Refer to your bike's service manual for torque specs on all hardware. Do not overtighten screws and bolts.
- Take care with wire harnesses and connectors. Improper connections can cause electrical issues.
- Test all lighting and accessories before operating the motorcycle. Re-check all hardware after the initial re-assembly ride to ensure a proper fit.

Leave a comment