Remove That Tour Pack in 10 Minutes Flat: A Harley Owner's Quick Guide
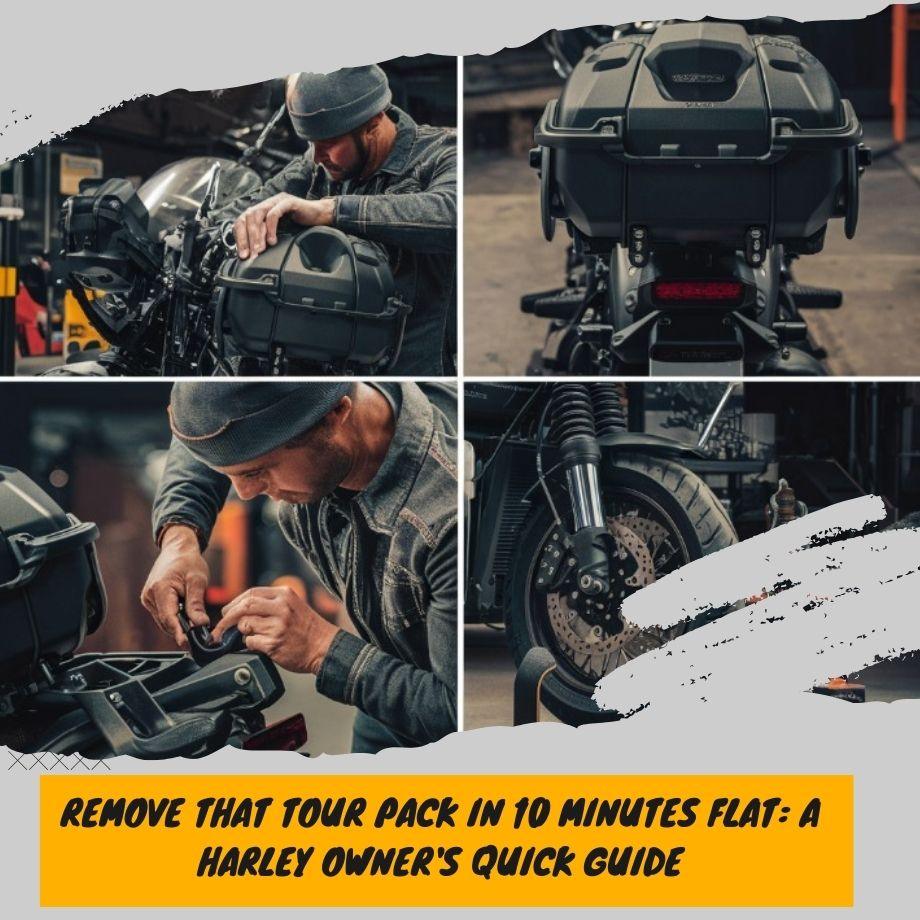
Tour packs are storage compartments that mount on the rear of Harley Davidson touring motorcycles. They provide extra cargo capacity while maintaining the streamlined aesthetics of the bike.
However, there are several reasons why a rider may need to remove their tour pack:
- Cleaning and detailing the motorcycle is easier without the tour pack in place.
- Some maintenance tasks like rear shock adjustments require removing the tour pack.
- Riders may want to remove heavy packs before transporting the motorcycle.
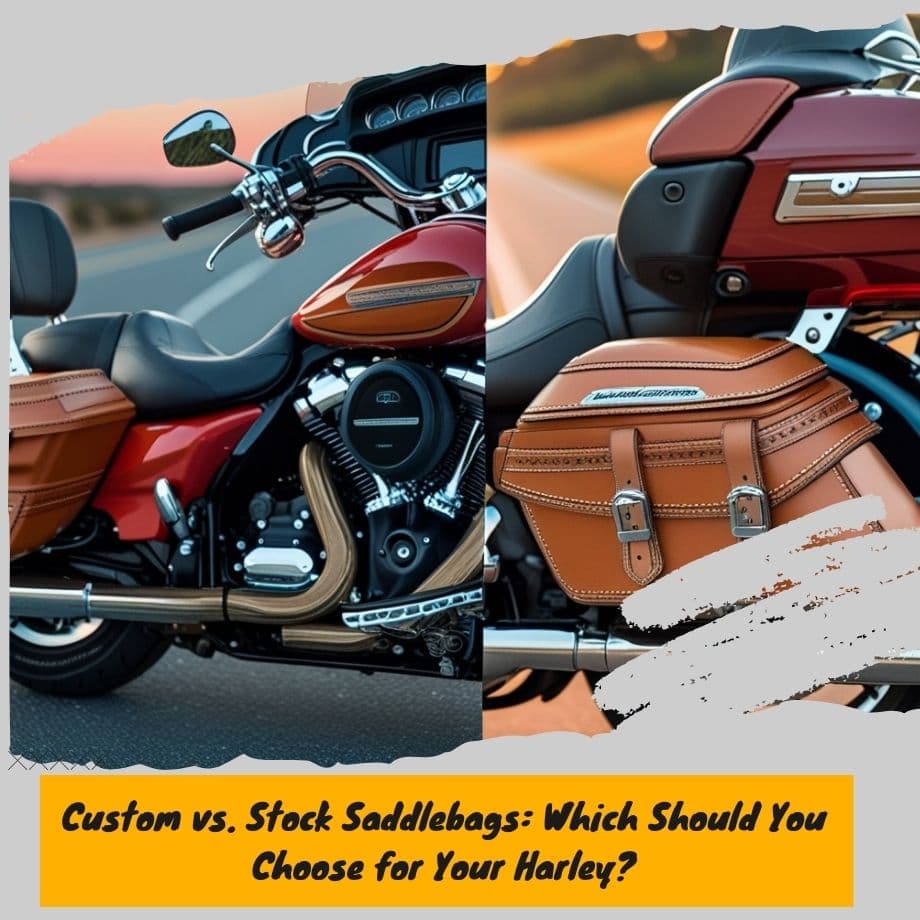
- Switching to a different style of luggage like saddlebags or a luggage rack.
When removing a tour pack, proper precautions should be taken to avoid damaging the motorcycle or tour pack.
Be sure to use the correct tools and follow the motorcycle manufacturer's instructions closely. Work slowly and carefully. Also, use proper stands to safely support the motorcycle in a level position.
Tools Needed
The main tools needed to remove a Harley Davidson tour pack are:
Socket set: You'll need a set of metric sockets to remove the bolts securing the tour pack. Typical sizes are 10mm, 13mm, and 15mm. Make sure your socket set includes both shallow and deep sockets. You may need an extension bar as well to reach some bolts.
Combination wrenches: A set of open-end/box-end wrenches in metric sizes can also be used instead of sockets for some bolts. At least 10mm, 13mm, and 15mm wrenches are recommended.
Hex keys/Allen wrenches: Hex keys in metric sizes are needed to loosen some of the smaller bolts on the tour pack brackets and trim pieces. Common sizes are 4mm, 5mm, and 6mm. Use hex keys with ball ends for better angle access.
Screwdrivers: Both flat head and Phillips head screwdrivers in a variety of sizes. Useful for interior trim panels and small screws.
Pliers: Standard pliers or locking pliers can aid in removing any stubborn fasteners.
Having this basic socket set, wrench set, hex keys, and screwdrivers will allow you to remove most tour pack designs. Always refer to your owner's manual for full tool requirements. Some tour packs may need Torx bits or specialty tools.
Preparing the Motorcycle
Before removing your Harley Davidson tour pack, it's important to properly prepare the motorcycle. This helps ensure the removal process goes smoothly and safely.
- Park the motorcycle on a level, solid surface. An unleveled surface can cause the bike to tip or fall when removing weight from the rear. Use the side or center stand if your model has one.
- Secure the motorcycle so it cannot tip or fall. Use tie-downs attached to sturdy mounting points, or have an assistant hold the bike upright. Leaning it against a wall is not sufficient.
- Disconnect the negative battery cable if your tour pack has integrated lighting or electronics. This prevents electrical shorts. Avoid touching the positive terminal to prevent sparks.
Properly preparing the motorcycle is a quick and easy first step that sets you up for safe, successful tour pack removal. Taking the time to park on level ground, secure the bike, and disconnect the battery prevents accidents and damage.
Removing the Tour Pack
Removing the tour pack itself will require accessing the mounting hardware that attaches it to the motorcycle. This process varies slightly depending on the specific model of tour pack, but generally involves the following steps:
- Locate and remove the seat or any components blocking access to the tour pack mounting bolts. Consult your owner's manual if unsure.
- Using the appropriate socket or wrench, loosen and remove the mounting bolts or nuts that secure the tour pack to the frame or luggage rack. Keep track of each bolt removed and set them aside.
- There are typically 4 main mounting bolts, 2 on each side of the pack. Remove them slowly in a criss-cross pattern.
- Once all mounting hardware has been removed, gently lift up on the tour pack to detach it from the mounting points on the bike. Be careful not to bend or damage any components.
- Lift the tour pack straight up and off the motorcycle. Take care not to scratch the paint or bodywork.
- Set the removed tour pack on a stable, protected surface to avoid damage.
Be sure to inspect all mounting locations, bolts, washers, and brackets for any signs of wear or damage once the tour pack has been detached. Replace any damaged or worn parts before reinstalling.
Disconnecting Electrical Components
When removing a Harley Davidson tour pack, you'll likely need to disconnect some electrical wiring and components. Take care when handling any electrical systems to avoid damage.
Wiring Precautions
- Avoid pulling or straining the wires. Gently disconnect each connector.
- Tape down or tie back any loose connector ends so they don't hang freely.
- Inspect the wires, connectors, and terminals for any cracks, damage, or corrosion.
- When reconnecting, make sure the connector orientation is correct before plugging in. Don't force connections.
- Double check that all electrical connections are fully secured after reassembly.
Proper Connector Handling
- Never pull on the wires themselves. Always grip the connector housing.
- Don't touch the exposed terminals or pin contacts. Only handle the insulated portions.
- Use dielectric grease on connections to prevent corrosion if exposing terminals.
- When disconnecting, pull straight out on the connector without rocking or twisting.
- Store any disconnected connectors in plastic bags to keep dirt and moisture out.
- Avoid letting connectors hang by the wires to prevent wire damage. Support them.
You May Also Like: The Integrated Speaker System
Inspecting the Area
Once the tour pack has been fully detached, it's important to thoroughly inspect the mounting area on the motorcycle. This serves two purposes:
Cleaning the Mounting Area
Carefully clean the mounting surface where the tour pack was attached. Use a soft cloth or microfiber towel to gently remove any dirt, grime, bugs, or debris that may have accumulated.
Be very careful around any exposed wiring or connectors. Avoid using any harsh chemicals or abrasives when cleaning. You want the mounting area to be as pristine as possible for reinstallation.
Checking for Damage
Closely examine the mounting area and surrounding components for any signs of damage, cracking, chipped paint, etc. Pay extra attention to the condition of any electrical connectors that were disconnected, as these can easily become damaged.
Look for any bolts or threaded holes that may have become stripped or cross-threaded. Also check that any gaskets or seals are still intact with no tears or dry rot. Address any issues found before attempting to reinstall the tour pack.
Reinstalling the Tour Pack
After removing the tour pack, you may decide you want to reinstall it later. When putting the tour pack back on, follow these steps:
- Thoroughly clean the mounting area on the motorcycle where the tour pack will connect. Remove any dirt, debris or corrosion.
- Apply a thread locker product to the mounting bolts to prevent them from vibrating loose. Refer to your owner's manual for the recommended product.
- Lift the tour pack into position and align the mounting points. You may need an assistant to hold it steady.
- Insert the mounting bolts and hand tighten them initially. Do not fully tighten yet.
- Check that the tour pack is properly centered and aligned. Look from the rear and sides to verify.
- Tighten the mounting bolts to the torque specifications in your owner's manual using a torque wrench. Tighten in a criss-cross pattern.
- Verify that the tour pack feels completely secure and does not shift at all when lightly pushed/pulled.
- Reconnect any electrical wiring or lighting connectors that were disconnected during removal. Refer to your wiring diagram.
- Turn the key on and test brake lights, turn signals and any other electrical components on the tour pack.
- Take the motorcycle for a short test ride and listen for any abnormal noises or issues.
- If any problems are noticed, recheck the connections and alignment. Do not ride the motorcycle until the tour pack is properly installed.
Following the proper realignment steps will ensure your tour pack is securely and safely reinstalled. Take your time and don't rush the process. Improper installation could result in damage or loss of control while riding.
Reconnecting Electrical
When reinstalling the tour pack, it's crucial to properly reconnect any electrical components that were disconnected during removal. Pay close attention to the following:
Wiring Best Practices
- Keep wires neat, clean, and away from any moving or hot components
- Use wire ties or looms to keep wiring organized and secured
- Inspect wires and connectors for damage before reconnecting
- Apply dielectric grease to connections to prevent corrosion
- Avoid kinks, sharp bends, or pinching the wires
- Double check wire routing compared to factory setup
Confirming Connections
- Ensure connectors are fully seated by gently tugging on them
- Listen for an audible click when plugging in connectors
- Check for proper alignment of any indexing features
- Verify wires are going to the correct component
- Shake wiring harnesses lightly to confirm nothing is loose
- Turn signals and lights should function properly when reconnected
- Use a multimeter to test for continuity on electrical circuits
Taking the time to properly reconnect the electrical system will prevent problems down the road. Don't rush this important step!
Final Checks and Adjustments
After reinstalling the tour pack, it's important to do some final checks and adjustments to ensure proper fitment and safety.
Check Proper Fitment and Alignment
With the tour pack back in place, visually inspect the alignment and fit. Make sure the pack sits flush against the motorcycle and that there are no large gaps or uneven surfaces.
Check that the latching mechanisms are properly engaged and secured. Try opening and closing any doors or compartments to verify smooth operation.
If you notice any fitment issues, loosen the mounting hardware and adjust the position of the tour pack as needed. Take your time with the adjustments until everything is properly aligned.
Torque All Fasteners to Spec
Using a torque wrench, torque all of the mounting bolts and hardware to the manufacturer's recommended specifications. Improperly torqued fasteners can vibrate loose over time. Refer to your owner's manual or online resources to find the correct torque values.
Start torquing from the center bolts and work your way outward in a criss-cross pattern. Recheck each bolt 2-3 times to ensure an evenly distributed load. Don't forget to torque any fairing hardware as well if applicable. Proper torque is critical to safety.
Do a Final Safety Check
Before riding, do a final walkaround and safety check. Make sure all lights are functioning, no cables are pinched or rubbing, nothing is loose or dangling, and all latches/compartments are secure. Also check the tire pressure. If anything looks amiss, take the time to address it. Your safety depends on it.
Safety Tips
When removing and handling your tour pack, it's crucial to follow proper safety protocols. This will help prevent injury to yourself or damage to your motorcycle. Here are some key safety reminders:
- Wear protective gear : Be sure to wear closed-toe shoes, gloves, and eyewear when working on your motorcycle. This will protect you from potential cuts, pinches, or debris while removing components.
- Use caution when lifting : Tour packs can be heavy and awkward to handle. Use proper lifting techniques and get a helper if needed. Don't strain yourself trying to muscle off a heavy component.
- Mind pinch points : Be aware of any pinch points when detaching brackets, panels, or electrical connectors. Go slowly and be deliberate in your movements.
- Support the tour pack : Don't let the pack hang loosely when detached. Support its weight fully until you can set it down securely. Dropping a tour pack can damage it. (Standard Tour Pack Weigh)
- Disconnect the battery - If you need to disconnect any electrical wiring, shut off and disconnect the battery first. This prevents electrical shorts or shocks.
- Follow torque specs - When reinstalling bolts or screws, follow the factory torque specifications. Improperly torqued fasteners can vibrate loose.
- Let components cool - If you've recently been riding, give your exhaust pipes, engine, and other components time to cool before working around them. Prevent burns.
- Use jack stands - For extended work, place jack stands under the frame to safely support the bike rather than relying on the kickstand alone.
- Check your work - Before riding, do a double check that all bolts are tightened, connections secured, and components properly reinstalled. Your safety depends on it!

Leave a comment