Ripped Off: The Complete Guide to Removing Harley Rear Fenders
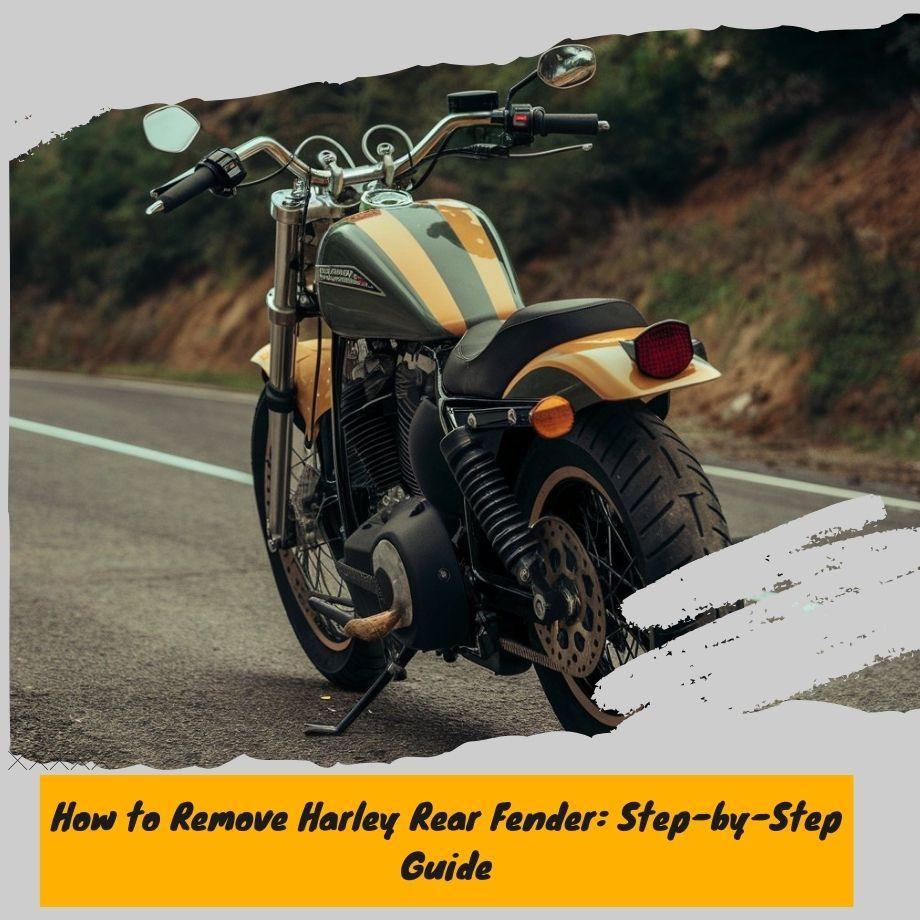
Customizing and modifying Harley-Davidson motorcycles is a passion for many riders. One popular modification is removing or replacing the rear fender, which can enhance the bike's appearance and performance.
Whether you're aiming for a sleek, minimalist look or upgrading to a more functional fender, this process requires careful planning and execution.
Removing the rear fender allows you to showcase more of the motorcycle's rear wheel and suspension components, creating a unique and eye-catching aesthetic.
Additionally, some riders opt to replace the stock fender with aftermarket options that offer better clearance, improved aerodynamics, or a distinct style that aligns with their personal preferences.
However, it's crucial to approach this modification with the right tools and safety precautions in mind.
Working on a motorcycle can be dangerous if not done correctly, and failing to follow proper procedures could result in damage to the bike or potential injuries.
Having the necessary tools and taking the appropriate safety measures is essential for a successful rear fender removal or replacement.
General Tools and Safety Precautions
When working on removing and replacing Harley Davidson rear fender extension, it's essential to have the right tools and follow proper safety precautions. Here are some common tools you'll need:
- Basic hand tools: Sockets, wrenches, pliers, and screwdrivers
- Allen wrenches or hex keys
- Torque wrench
- Ratchet and extension bars
- Penetrating oil or lubricant
- Wire cutters or pliers
- Electrical tape
It Might Be Useful: Standard Rear Fender Width
As for safety precautions, always remember to:
- Work in a well-lit, clean, and organized workspace
- Secure the motorcycle properly, using a motorcycle stand or lift
- Disconnect the battery to avoid electrical hazards
- Wear appropriate protective gear, such as gloves and safety glasses
- Follow the manufacturer's instructions and torque specifications
- Take your time and avoid rushing through the process
- Keep the work area clear of clutter and potential trip hazards
- Be cautious when working with electrical components and wiring
How to Remove a Harley Rear Fender
Removing the rear fender on a Harley-Davidson motorcycle is a common task for customization, repair, or upgrade purposes. While the specific steps may vary slightly between models, there are some general guidelines that apply to most Harleys.
First, you'll need to remove the seat. This typically involves unscrewing a few bolts or releasing a latch mechanism. Once the seat is off, you'll have better access to the rear fender area.
Next, locate and disconnect any wiring or electrical components attached to the rear fender. This may include turn signals, brake lights, or other accessories. Be sure to carefully disconnect each wire and make note of where they were connected for easier reassembly later.
You May Also Like : How to Install Detach on Custom Harley Rear Fender
With the wiring disconnected, you can begin removing the bolts or fasteners that secure the rear fender to the frame. These are typically located along the sides and bottom of the fender. You may need to use a combination of wrenches, sockets, and possibly a rubber mallet to loosen stubborn bolts.
As you remove the bolts, support the weight of the rear fender to prevent it from falling and causing damage. Carefully lift or slide the fender off the motorcycle once all the fasteners are removed.
It's important to work methodically and keep track of all the bolts, washers, and other hardware as you disassemble the rear fender. This will make the reassembly process much easier when you're ready to reinstall the fender or a replacement.
How to Remove Rear Fender on Harley Touring
To remove the rear fender on a Harley-Davidson Touring model, follow these detailed steps:
-
Begin by removing the seat. On Touring models, the seat is typically held in place by a large allen bolt or two smaller bolts at the front and a latch or cable at the rear.
-
Next, locate the rear fender mounting bolts. These are usually found underneath the rear of the fender, near where it meets the swingarm.
-
Carefully remove the rear fender mounting bolts using the appropriate socket or wrench. You may need to support the fender as you remove the last bolt to prevent it from falling.
-
Disconnect any wiring or lighting components attached to the rear fender. This may include turn signals, running lights, or license plate illumination.
-
Gently pull the rear fender away from the motorcycle, taking care not to scratch or damage any painted surfaces.
-
If the fender is equipped with a fender trim or other accessories, you may need to remove these components first before proceeding with the fender removal.
-
Once the rear fender is completely detached, you can set it aside and proceed with any necessary repairs, replacements, or customizations.
How to Remove Rear Fender on Harley Sportster
To remove the rear fender on a Harley-Davidson Sportster, follow these detailed steps:
-
Begin by removing the seat. On most Sportster models, the seat is secured by a single bolt or latch at the rear.
-
Next, locate and disconnect the rear fender's wiring harness. This is typically found near the fender's mounting points and may require the removal of a few plastic covers or panels.
-
Loosen and remove the bolts or screws securing the rear fender to the frame. The number and location of these bolts can vary between Sportster models and years.
-
Carefully pull the rear fender away from the motorcycle, taking care not to damage any wiring or surrounding components.
-
If the fender is equipped with turn signals or a license plate light, you may need to disconnect these additional wiring harnesses before fully removing the fender.
-
Once the fender is detached, you can proceed with any necessary repairs, replacements, or customizations.
How to Remove a 2015 Harley Rear Fender
Removing the rear fender on a 2015 Harley-Davidson motorcycle requires a few extra steps compared to other models. First, you'll need to remove the saddlebags and any accessories mounted on the fender. Next, disconnect the rear turn signal wires and unscrew the license plate light.
Once those components are removed, you can begin unfastening the rear fender. On the 2015 models, there are typically four bolts securing the fender to the frame – two on each side. Use a socket wrench to remove these bolts carefully.
With the bolts out, the rear fender should now be loose. However, you may need to gently pry or wiggle it free from any tight spots. Be careful not to scratch the paint or bend the fender during this process.
After the fender is detached, you can set it aside and proceed with any customization, repair, or replacement work needed. Remember to keep all the hardware organized and refer to a service manual if you encounter any difficulties specific to the 2015 model year.
How to Remove a Harley Davidson Sportster Rear Fender
This variation for removing the rear fender on a Harley-Davidson Sportster model requires a few additional steps compared to the general process.
Begin by removing the seat and disconnecting the rear taillight wiring harness.
Next, locate the fender mounting bolts, which are typically found underneath the rear fender near the struts.
Loosen and remove these bolts carefully, as they may be tight or corroded. With the mounting bolts removed, you should be able to wiggle the rear fender loose.
You May Also Interested: Customizing Softail Rear Fenders
However, on some Sportster models, you may need to remove the rear turn signals or license plate bracket first to fully detach the fender.
Once the fender is free, gently pull it away from the motorcycle, being cautious of any wiring or components still connected. Disconnect the rear turn signal wires if necessary. With the rear fender completely removed, you can proceed with any customization, repair, or replacement work required.
How to Remove Harley Breakout Rear Fender
Removing the rear fender on a Harley-Davidson Breakout requires a few tools and some patience. Here are the detailed steps:
-
Begin by removing the seat and disconnecting the negative battery cable to prevent any electrical shorts.
-
Locate the rear fender mounting bolts, typically found underneath the fender near the struts. There are usually 4-6 bolts holding the fender in place.
-
Using the appropriate socket wrench, loosen and remove these mounting bolts carefully.
-
Next, you'll need to disconnect the rear turn signal wires and license plate light wiring from the fender.
-
With the bolts and wiring disconnected, you should now be able to carefully pull the rear fender away from the motorcycle.
-
If the fender is still stuck, check for any other mounting hardware or clips that may be holding it in place.
-
Once the fender is completely detached, set it aside in a safe location.
-
Be sure to keep all the mounting hardware organized, as you'll need to reinstall or replace it when putting on a new fender.
It May be Interesting: What is a Bobber Rear Fender?
It's important to work slowly and carefully to avoid damaging any components during the removal process. With the right tools and patience, removing the Harley Breakout rear fender can be a straightforward task.
How to Remove Harley Deuce Rear Fender
Removing the rear fender on a Harley-Davidson Deuce is a straightforward process that requires a few basic tools and some patience. Here's a step-by-step guide to help you through the process:
-
Begin by placing your Deuce on a level surface and engaging the parking brake. This will ensure the motorcycle remains stable throughout the process.
-
Next, remove the seat by unscrewing the mounting bolts or releasing the latch mechanism, depending on your specific model.
-
Locate the rear fender mounting bolts, typically found on the underside of the fender near the struts or supports. Use the appropriate socket or wrench to loosen and remove these bolts.
-
Carefully disconnect any wiring harnesses or electrical components attached to the rear fender. Make sure to note the routing and positioning of these components for easy reassembly later.
-
With the mounting bolts and wiring disconnected, you should now be able to gently pull the rear fender away from the motorcycle frame.
-
If the fender is stubborn or stuck, check for any remaining hardware or mounting points that may need to be loosened or removed.
-
Once the rear fender is completely detached, carefully set it aside in a safe location to avoid any accidental damage.
How to Remove Harley Logo on Roaking Rear Fender
Removing the Harley logo from a Roaking rear fender can be a straightforward process with the right tools and techniques. Here are the steps to follow:
-
Gather the necessary tools: You'll need a heat gun, a plastic putty knife or razor blade, and some goo gone or adhesive remover.
-
Prepare the work area: Place the fender on a flat, stable surface and ensure you have adequate lighting and ventilation.
-
Heat the logo: Use the heat gun to slowly and evenly heat the Harley logo. Be careful not to overheat the plastic, as it can cause warping or discoloration.
-
Pry off the logo: Once the adhesive has softened from the heat, use the plastic putty knife or razor blade to gently pry the logo off the fender. Work slowly and carefully to avoid damaging the fender's surface.
-
Remove any remaining adhesive: After removing the logo, inspect the area for any leftover adhesive. Apply some goo gone or adhesive remover to a clean cloth and gently rub the area to remove any residue.
-
Clean the surface: Once the logo and adhesive are removed, use a mild soap and water solution to clean the area thoroughly. Dry the surface with a clean cloth or paper towels.
-
Inspect and touch up: Carefully inspect the fender for any scratches or imperfections caused during the logo removal process. If necessary, use a touch-up paint or clear coat to restore the fender's finish.
How to Remove Harley Nightster Rear Fender
Removing the rear fender on a Harley-Davidson Nightster requires a few simple steps. First, you'll need to remove the seat by unscrewing the bolt located at the rear of the seat. Once the seat is off, you can access the rear fender mounting bolts.
There are typically two bolts on each side of the fender that need to be removed. These bolts secure the fender to the frame. Use the appropriate socket wrench to loosen and remove these bolts carefully.
After the side bolts are out, there may be additional bolts or clips holding the rear portion of the fender in place. Remove any remaining hardware securing the fender. At this point, the rear fender should be free and can be lifted off the motorcycle.
Take care when removing the fender, as there may be wiring or other components attached that need to be disconnected properly. Consult your service manual for any specific instructions regarding wiring or other components on your particular Nightster model.
With the fender removed, you can now access the rear area for maintenance, customization, or to install a replacement fender as desired.
How to Remove Harley Street Glide Rear Fender
To remove the rear fender on a Harley-Davidson Street Glide, follow these steps:
-
Begin by removing the seat. On the Street Glide, this typically involves unscrewing a few bolts and lifting the seat off.
-
Next, locate the rear fender mounting bolts, usually found on the underside of the fender near the struts.
-
Use the appropriate socket or wrench to loosen and remove these mounting bolts, taking care not to drop any small parts.
-
Carefully disconnect any wiring harnesses or lighting components attached to the rear fender.
-
With the mounting bolts removed and wires disconnected, you should now be able to lift the rear fender off the motorcycle.
-
If the fender is still secured by additional clips or fasteners, gently pry or unscrew these to fully detach the fender.
-
Once the rear fender is removed, take the opportunity to inspect the area for any rust, damage, or necessary repairs before installing a new fender.
It's crucial to work slowly and carefully during this process, as forced removal could damage the fender or surrounding components.
Additionally, refer to your specific Harley-Davidson service manual for any model-specific instructions or torque specifications.


Leave a comment