How to Install and Align Sick Custom Fenders on Your Harley
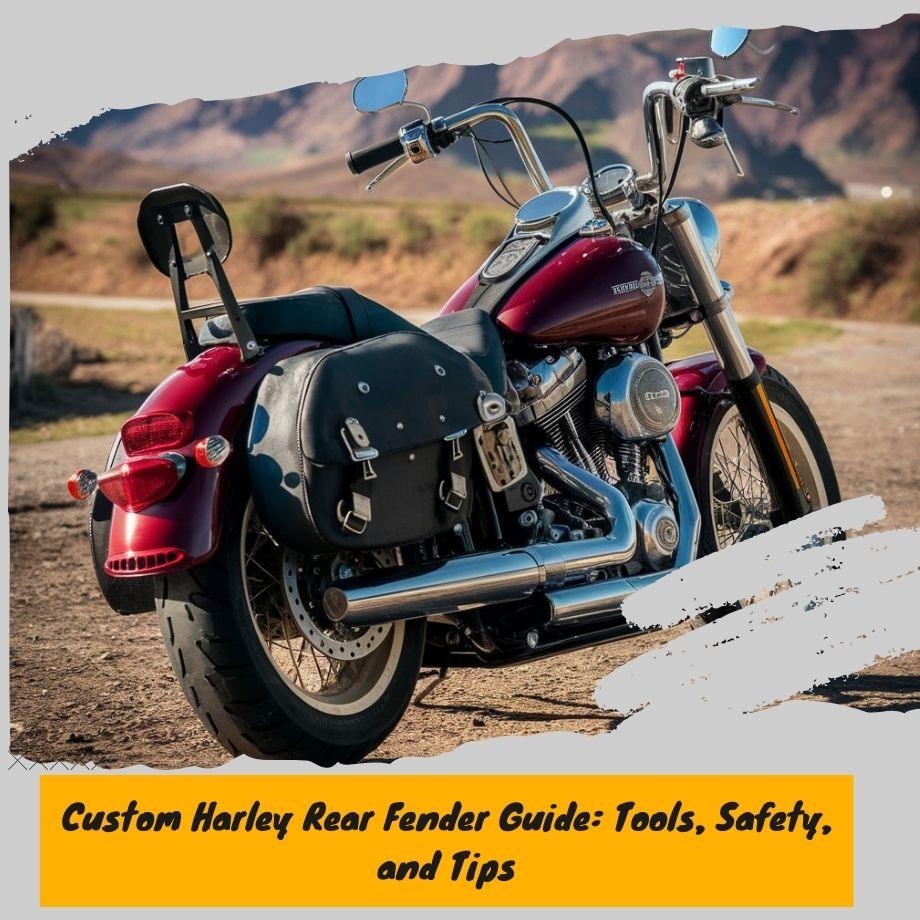
Installing and aligning custom rear fenders on Harley-Davidson motorcycles is a popular modification that allows riders to enhance the aesthetics and functionality of their bikes.
Custom rear fenders offer a unique opportunity to personalize the appearance of your Harley, ensuring it stands out from the crowd. Beyond the visual appeal, custom fenders can also provide a better fit with other aftermarket parts, improving aerodynamics and offering better protection from road debris.
One of the key benefits of installing custom rear fenders is the ability to achieve a seamless integration with other custom components, such as stretched saddlebags or detachable sissy bars.
This harmonious combination not only looks sleek and stylish but also contributes to the overall performance and comfort of your ride.
However, it's crucial to approach the installation and alignment process with the right tools and safety precautions in mind. Proper preparation and attention to detail can ensure a smooth installation, preventing potential issues down the road.
Having the necessary tools on hand and following safety guidelines will not only make the process more efficient but also help protect you and your motorcycle from potential harm.
General Tools and Safety Precautions
When working on installing or aligning custom rear fenders on your Harley-Davidson motorcycle, it's essential to have the right tools and follow proper safety precautions. Here are some common tools you'll need:
- Basic hand tools (wrenches, sockets, pliers, etc.)
- Torque wrench
- Allen wrenches
- Screwdrivers (flat-head and Phillips)
- Rubber mallet
- Loctite or thread-locking compound
It May Be Interesting : Extended Softail Rear Fenders
As for safety precautions, always keep the following in mind:
- Work in a well-lit and organized area.
- Secure the motorcycle properly on a level surface or motorcycle lift.
- Wear appropriate protective gear, such as gloves and eye protection.
- Follow the manufacturer's instructions and torque specifications.
- Be cautious when handling heavy components to avoid injury.
- Double-check all connections and fasteners before reassembling.
Taking the necessary precautions and having the right tools on hand will ensure a smooth and safe installation or alignment process.
How to Install Detach on Custom Harley Rear Fender
Installing a detachable rear fender on your custom Harley-Davidson motorcycle is a great way to enhance the bike's appearance and functionality. This process involves removing the existing fender, preparing the area, and installing the detach kit. Here's a detailed guide to help you through the steps:
-
Remove the Existing Rear Fender: Start by removing the existing rear fender from your Harley. This typically involves unscrewing a few bolts or fasteners that secure the fender to the motorcycle frame. Consult your bike's manual or seek professional assistance if you're unsure about the proper removal process.
-
Prepare the Area: Once the old fender is removed, thoroughly clean the area where the new fender will be installed. Remove any dirt, debris, or rust to ensure a smooth and secure fit. You may need to use a degreaser or sandpaper to prepare the surface properly.
-
Install the Detach Kit: Most detachable rear fenders come with a detach kit that includes mounting brackets, hardware, and instructions. Follow the manufacturer's instructions carefully to install the detach kit onto your motorcycle frame. Ensure that all brackets and components are securely tightened and properly aligned.
-
Fit the Custom Rear Fender: With the detach kit installed, carefully position the custom rear fender onto the mounting brackets. Make sure the fender is properly aligned and sits flush against the motorcycle body. Adjust the fender as needed to achieve the desired fit and alignment.
-
Secure the Fender: Once the fender is properly aligned, use the provided hardware (such as bolts, screws, or clamps) to secure it in place. Tighten all fasteners according to the manufacturer's specifications, ensuring a secure and rattle-free fit.
-
Check Alignment and Clearance: After securing the fender, double-check the alignment and clearance around other components, such as the rear wheel, exhaust pipes, and saddlebags. Ensure that the fender does not interfere with the motorcycle's operation or cause any rubbing or contact issues.
-
Final Adjustments: If necessary, make any final adjustments to the fender's position or alignment. Tighten all hardware securely, and double-check that everything is properly installed and functioning correctly.
How to Install Detach Sissy Bar on Custom Harley Rear Fender
Installing a detachable sissy bar on your custom Harley-Davidson rear fender is a great way to add functionality and style to your ride. The sissy bar provides a backrest for your passenger, enhancing comfort on long rides. Here's a step-by-step guide to help you install it correctly:
-
Prepare the Mounting Area: Clean the area where the sissy bar will be mounted, ensuring it's free from dirt, debris, and any existing mounting hardware. This will help ensure a secure fit.
-
Attach the Mounting Plates: Most detachable sissy bar kits come with mounting plates that need to be attached to the fender. Follow the manufacturer's instructions carefully, and use the provided hardware to securely fasten the plates in the correct position.
-
Install the Sissy Bar: With the mounting plates in place, you can now attach the sissy bar itself. Carefully align the sissy bar with the mounting plates, and use the provided hardware to secure it in place. Ensure that all bolts and nuts are tightened to the recommended torque specifications.
-
Check for Proper Alignment: Once the sissy bar is installed, take a step back and check for proper alignment. The sissy bar should be centered and level with the rear fender. Adjust as necessary until you achieve the desired alignment.
-
Secure the Sissy Bar: After ensuring proper alignment, double-check that all hardware is tightened securely. This will prevent any rattling or loosening during your rides.
It's important to note that some Harley-Davidson models may have specific installation requirements or variations.(Harley Rear Fender Dimensions)
For example, on certain touring models, you may need to remove the rear seat or other components to access the mounting area properly. Always consult your motorcycle's service manual or seek professional assistance if you're unsure about any aspect of the installation process.
Proper alignment and secure installation are crucial for the safe and optimal performance of your detachable sissy bar. Take your time, follow the instructions carefully, and don't hesitate to seek help if needed. With the right approach, you'll have a stylish and functional addition to your custom Harley-Davidson motorcycle.
How to Install Rear Fender on Harley-Davidson Road King
Installing a rear fender on a Harley-Davidson Road King requires careful preparation and attention to detail. Here's a step-by-step guide to ensure a proper fit and secure installation:
Preparations:
- Park your Road King on a level surface and engage the parking brake.
- Remove the existing rear fender by unscrewing the mounting bolts and disconnecting any wiring or lighting components.
- Clean the mounting area thoroughly, removing any dirt, debris, or rust.
- Lay out the new rear fender and all necessary hardware, ensuring you have everything required for the installation.
You May Also Like: The Ideal Harley Sportster Rear Fender
Fitting the Fender:
- Position the new rear fender in place, aligning the mounting holes with the corresponding points on the motorcycle frame.
- If necessary, make any adjustments to the fender's position to ensure a proper fit and alignment with the rear wheel, saddlebags, and other components.
- Use the provided spacers or shims (if applicable) to achieve the desired fender gap and clearance.
Securing in Place:
- Install the mounting bolts or fasteners, starting with the top or center points and working your way outward.
- Tighten the bolts or fasteners following the recommended torque specifications to ensure a secure fit.
- Double-check the fender's alignment and make any necessary adjustments before fully tightening all hardware.
- Reconnect any wiring or lighting components, ensuring proper routing and connections.
Road King Model Considerations:
- The Road King features a unique rear suspension setup, which may require additional clearance or adjustments for the new fender installation.
- Pay close attention to the fender's clearance around the rear wheel, especially when the suspension is compressed or extended.
- Consult your Road King's service manual or seek professional assistance if you encounter any model-specific challenges or have concerns about proper fitment.
How to Align Harley-Davidson Rear Fender with Stretched Saddlebags
Aligning the rear fender with stretched saddlebags on a Harley-Davidson motorcycle is crucial for both aesthetic appeal and functional purposes. Proper alignment ensures a seamless and cohesive look, while also preventing any interference or rubbing between the components during operation.
You May Also Like: Materials for Bobber Rear Fenders
To begin, ensure that the rear fender and stretched saddlebags are correctly installed and securely mounted. Next, visually inspect the alignment, checking for any gaps or uneven spacing between the fender and saddlebags. If misalignment is present, proceed with the following steps:
- Loosen the mounting hardware for the rear fender, allowing for slight adjustments.
- Gently shift the fender into the desired position, ensuring an even gap between the fender and saddlebags on both sides.
- Once aligned, tighten the mounting hardware securely, being careful not to over-tighten and risk damaging the components.
- Double-check the alignment by inspecting from various angles, including a side view and a rear view.
It's essential to ensure a secure fit between the aligned components. Any looseness or play can lead to potential rubbing or contact during riding, which can cause premature wear or damage. Consider using spacers or shims if necessary to achieve a snug fit while maintaining proper alignment.
Additionally, it's recommended to periodically check the alignment, as vibrations and road conditions can potentially shift the components over time. Regular inspections and adjustments can help maintain the desired alignment and prevent any issues.
By following these steps, you can achieve a visually appealing and functionally sound alignment between the rear fender and stretched saddlebags on your Harley-Davidson motorcycle, ensuring a seamless and enjoyable riding experience.
Conclusion
The process of installing and aligning custom rear fenders on Harley-Davidson motorcycles requires precision, attention to detail, and the right tools. Throughout this guide, we've covered the step-by-step procedures for installing detachable components, sissy bars, and complete rear fenders on various Harley models, including the Road King.
It's crucial to follow the proper steps and use the recommended tools to ensure a secure fit, proper alignment, and a seamless integration with other custom parts like stretched saddlebags. Skipping steps or using improper techniques can lead to misalignment, instability, and potential safety hazards.
A few additional tips and common issues to keep in mind:
- Double-check all measurements and alignments before tightening any bolts or fasteners.
- Use thread locker or Loctite on bolts to prevent loosening over time due to vibrations.
- Ensure all wiring harnesses and cables are properly routed and secured to avoid pinching or damage.
- Pay close attention to clearances between the fender and other components, such as the tire, exhaust pipes, and saddlebags.
- If you encounter any difficulties or uncertainties during the installation process, consult a professional mechanic or seek guidance from experienced Harley enthusiasts.
Remember, a well-executed custom fender installation can enhance the aesthetic appeal and functionality of your Harley-Davidson motorcycle, making it a truly personalized and unique ride.
If you're in need of a replacement rear fender or looking to customize your Harley with a sleek new fender extension, check out our product page for the Harley Rear Fender Extension. Our high-quality, precision-fit fenders are designed to enhance the look and functionality of your bike.
We invite you to share your experiences with installing and aligning custom rear fenders on your Harley-Davidson. Leave a comment below with any questions, tips, or insights you'd like to share with fellow riders.
Your feedback helps us continue improving our products and providing valuable information to the Harley community.


Leave a comment