Harley Tour Pack Wall Hanger Guide: Installation, Benefits & Maintenance
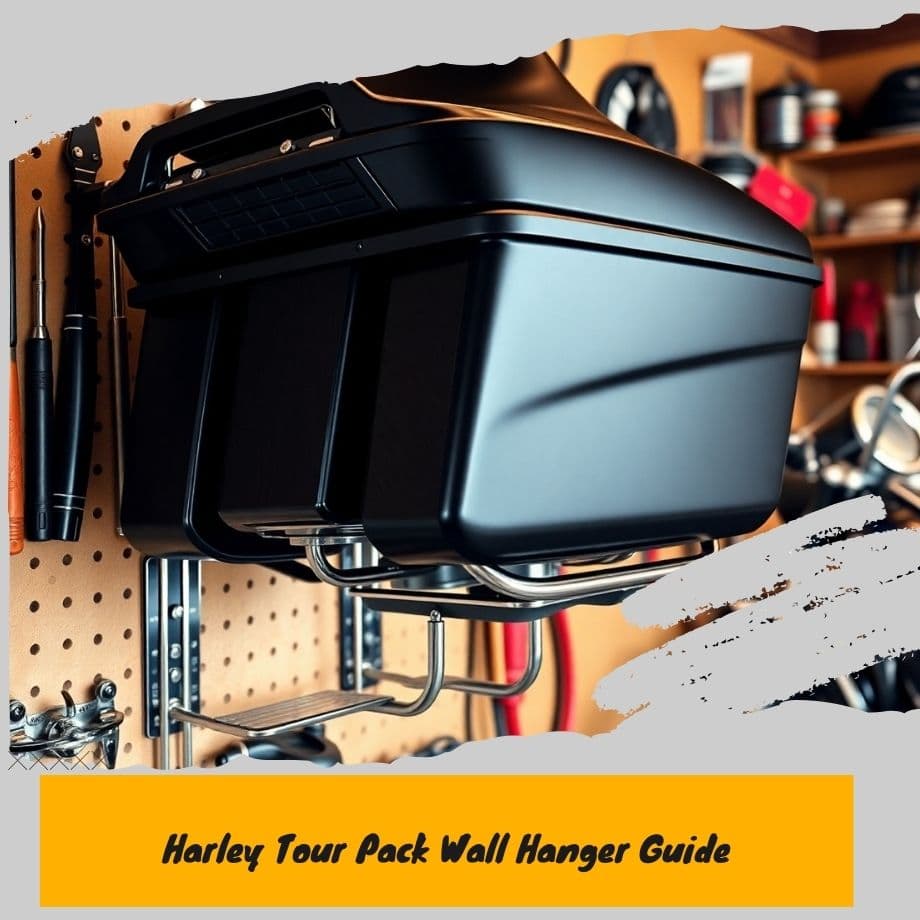
When you're not on the road, your Harley Davidson tour pack deserves a safe and convenient place to rest. The Harley tour pack wall hanger is the perfect solution, allowing you to store your tour pack securely while saving valuable garage space.
In this guide, we’ll walk you through the installation process, benefits, and maintenance tips for a Harley tour pack wall hanger.
Why a Tour Pack Wall Hanger?
Storing your Harley Davidson tour pack can be a hassle. With the bulk and size of the pack, it's often difficult to find a space-saving and secure solution. That's where a tour pack wall hanger comes into play. This simple yet effective storage solution keeps your Harley's gear safe while also providing easy access when needed. Plus, it’s a great way to organize your space, keeping your garage clutter-free.
Benefits of Using a Harley Tour Pack Wall Hanger
A tour pack wall hanger isn't just about convenience—it offers multiple advantages:
- Space Saving: Ideal for garages, sheds, or even indoors, it maximizes vertical space by hanging the pack off the ground.
- Protection: Keeps your tour pack off the floor, preventing potential damage from dirt, moisture, or accidental falls.
- Easy Access: By hanging your pack, you ensure it's easily reachable whenever you're ready for your next ride.
- Organization: Helps to declutter your space and makes the tour pack a part of your garage’s aesthetic.
How to Install a Harley Tour Pack Wall Hanger
Step 1: Gather Your Tools and Materials
Before you begin, make sure you have the following tools and materials:
- Tour pack wall hanger kit (check if it’s compatible with your Harley model)
- Measuring tape
- Stud finder
- Level
- Power drill with drill bits
- Screws and anchors (usually included with the hanger kit)
- Screwdriver
Step 2: Choose the Right Location
Choosing the right location for your wall hanger is crucial for the stability of your tour pack. Follow these steps:
- Find the studs: Use a stud finder to locate the studs in the wall, as these will provide the necessary support.
- Select a height: Make sure the height allows for easy access to the tour pack. Ideally, the pack should be about eye level or slightly higher.
Step 3: Mark and Measure
Once you’ve found the studs, use the measuring tape to mark where the wall hanger will go. It’s crucial to measure the spacing of the mounting holes on the wall hanger, ensuring they align with the studs.
Step 4: Drill Pilot Holes
Using your power drill, drill pilot holes at the marked locations. This will help you insert the screws securely.
Step 5: Mount the Hanger
Using the screws and anchors provided with your wall hanger kit, mount the bracket onto the wall. Be sure to tighten everything securely.
Step 6: Hang Your Tour Pack
Now, carefully hang your Harley tour pack onto the wall hanger. Ensure the pack is level and fully supported.
Mounting Tips for a Secure Installation
To ensure your Harley tour pack is securely mounted, here are a few additional tips:
- Use heavy-duty wall anchors: If you’re mounting the hanger into drywall without studs, make sure to use heavy-duty anchors that can support the weight of the tour pack.
- Consider wall material: If you’re installing the hanger in a non-drywall surface, like brick or concrete, you’ll need special masonry screws or anchors.
- Double-check the weight capacity: Make sure your wall hanger is rated for the weight of your Harley tour pack.
- Leveling: Always use a level to ensure the wall hanger is straight. This not only ensures it looks neat but also ensures the pack is distributed evenly.
Maintaining Your Harley Tour Pack Wall Hanger
Proper maintenance of your wall hanger will prolong its lifespan and ensure your tour pack stays secure.
- Inspect regularly: Check the screws and anchors every few months to make sure they’re still secure. Tighten if necessary.
- Clean the hanger: Periodically clean the hanger with a damp cloth to remove dirt and dust buildup.
- Check the wall condition: Ensure the wall itself is in good condition and can still support the hanger’s weight. If you notice any cracks or damage, consider reinforcing the area.
Common Issues and How to Troubleshoot
If you’re encountering issues with your wall hanger, here are some common problems and their solutions:
- Wall hanger tilting: If the wall hanger seems to be tilting, it might not have been mounted securely. Check the screws and ensure the hanger is level.
- Tour pack slipping off: This could be due to improper installation. Ensure the hanger is designed for your Harley’s tour pack model, and double-check the weight capacity.
- Damaged wall: If the wall starts showing signs of damage, reinforce the area with additional support or consider relocating the hanger.
Conclusion: A Convenient and Safe Storage Solution
Installing a Harley tour pack wall hanger is a simple and effective way to keep your Harley gear organized, safe, and easily accessible. By following the steps outlined in this guide, you’ll be able to secure your tour pack in no time. Whether you’re looking to save space in your garage or keep your equipment off the floor, this wall hanger provides an ideal solution.
If you take care of your hanger and regularly inspect it, you can expect it to last for years to come. Enjoy the convenience and peace of mind that comes with knowing your Harley tour pack is stored securely!

Leave a comment