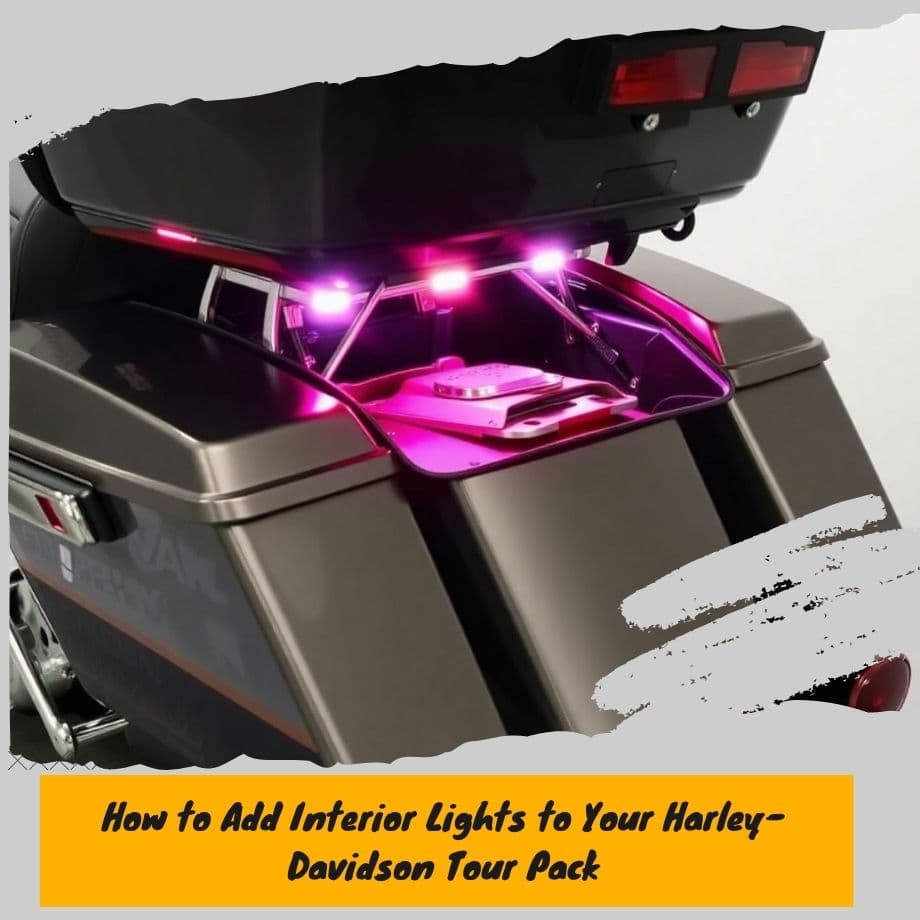
How to Add Interior Lights to Your Harley-Davidson Tour Pack
Upgrading your Harley-Davidson motorcycle with the right accessories can make all the difference, not only in aesthetics but also in functionality. One such upgrade that can enhance both is adding interior lights to your Harley-Davidson Tour Pack.
These lights not only brighten the inside of your luggage compartment, making it easier to access your gear in low light, but they also add a custom touch to your bike. In this step-by-step guide, we'll show you how easy it is to install interior lights in your Tour Pack—helping you boost both the functionality and look of your Harley.
Why Add Interior Lights to Your Harley Tour Pack?
Before diving into the installation process, it’s important to understand why interior lights for your Harley-Davidson Tour Pack are such a great idea.
Increased Visibility
Interior lights improve visibility inside the Tour Pack, allowing you to find your gear more easily, especially when riding at night or when the weather is less than ideal. No more fumbling around in the dark to grab that extra pair of gloves or your phone charger!
Stylish Upgrade
Adding interior lights isn’t just practical—it's a stylish enhancement. LED lights come in various colors and designs, adding a custom, sleek look to your bike. Whether you prefer a subtle glow or something brighter, there's an option for every rider.
Better Organization
When everything is illuminated, it’s easier to keep your gear organized. You can see everything at a glance, making packing and unpacking your Tour Pack a breeze, even during those late-night pit stops or early morning rides.
What You’ll Need
Before you begin installing interior lights in your Harley-Davidson Tour Pack, make sure you have the right tools and materials:
- LED Interior Light Kit compatible with Harley-Davidson Tour Packs.
- Wire Strippers for cutting and preparing wires.
- Soldering Kit (or electrical connectors if you prefer not to solder).
- Electrical Tape to secure and insulate wires.
- Screwdriver Set for removing any necessary parts.
- Drill and Small Drill Bit (if you need to drill holes for mounting).
- Power Source (12V DC) or connection to your bike’s electrical system.
- Safety Gloves to protect your hands during installation.
Step 1: Prepare Your Tour Pack
The first step is to prepare your Tour Pack. Empty the contents of your luggage compartment to avoid any accidental damage during installation. It's also a good idea to place your motorcycle on a stable surface or center stand to ensure it’s secure while you work.
Additionally, to ensure safety, disconnect the bike’s battery before working with the electrical components. This minimizes any risk of electrical mishaps.
Step 2: Choose the Right Location for the Lights
Next, you’ll need to decide where you want to place your interior lights inside the Tour Pack. For a clean and functional look, the edges or corners of the compartment are ideal. These areas ensure even illumination without obstructing the contents.
Pro Tip: Before securing the lights in place, temporarily attach them with tape to test the positioning. This will give you an idea of how the lights will look when they’re fully installed and allow you to make any adjustments before committing to a final location.
Step 3: Prepare and Install the LED Light Kit
Now it’s time to start installing the LED light kit.
- Route the wires: Plan out where the wiring will run to prevent it from getting pinched or tangled. You want to avoid any unnecessary tension or interference with other parts of the bike.
- Attach the lights: Peel the backing off the adhesive strip on the LED lights, then carefully stick them along the edges or corners inside your Tour Pack. Once the lights are in place, press firmly to ensure a strong, secure bond.
Pro Tip: If your LED kit is more than just adhesive-backed, you may need to use screws or clips to mount the lights. This is especially true for larger, more powerful light strips.
Step 4: Connect the Wiring
With the lights in place, it’s time to wire them into your bike’s electrical system.
-
Strip the wires and connect them to your power source. Here are your options:
- Option 1: Tap into your bike’s 12V DC electrical system (e.g., the accessory circuit) to power the lights. This requires a bit of knowledge of your bike’s wiring, but it’s a clean and reliable way to power the lights.
- Option 2: If you don’t want to tap into your bike’s electrical system, you can use an external 12V battery pack or a USB-powered adapter to power the lights.
Once the wiring is connected, make sure all connections are insulated and secured with electrical tape. This ensures that no wires are exposed, which could cause a short circuit.
Step 5: Test the Lights
Before you secure everything in place, reconnect the bike’s battery and test the lights to make sure they work. If everything is hooked up properly, the lights should turn on without a hitch.
If the lights don’t turn on, double-check the wiring connections and the power source. It's common for small mistakes to happen during the wiring process, so don’t be discouraged—just make the necessary adjustments and test again.
Step 6: Secure the Wiring and Lights
Once the lights are working perfectly, it’s time to clean up the installation.
- Secure any loose wiring using zip ties to keep things neat and tidy inside the Tour Pack. Make sure the wires are not under any tension or positioned where they could get pinched.
- You may also need to screw or clip the lights in place for additional security, especially if you’ve chosen a mountable kit instead of adhesive.
Step 7: Reassemble the Tour Pack
With the lights installed and wiring secured, you can reassemble the Tour Pack. Carefully put everything back in place, making sure that nothing is obstructing the lights or blocking any compartments. Once you’ve double-checked everything, close the Tour Pack securely.
Step 8: Final Test and Adjustment
After reassembling, give the lights one last test to make sure everything is functioning as it should. Turn on the lights and check for any areas that might need adjustment—such as dim spots or uneven lighting.
Conclusion
Adding interior lights to your Harley-Davidson Tour Pack is a great way to enhance both the functionality and style of your bike. The installation process is relatively simple, and with a few tools and an LED light kit, you can complete this upgrade in just a couple of hours.
Not only will you enjoy better visibility and easier access to your gear, but your Harley will also look even cooler with the added custom touch. So, grab your tools and get started on this quick, affordable upgrade that will make your riding experience even better!
FAQs
1. Can I install interior lights in any Harley-Davidson Tour Pack?
Yes, as long as you choose an LED kit compatible with your specific model and size of the Tour Pack.
2. How long does it take to install interior lights in a Harley Tour Pack?
On average, it takes about 1-2 hours depending on your experience and the complexity of the wiring.
3. Will the lights drain my motorcycle battery?
No, when installed correctly and connected to the proper power source, the lights use minimal power and will not drain your bike’s battery quickly.

Leave a comment