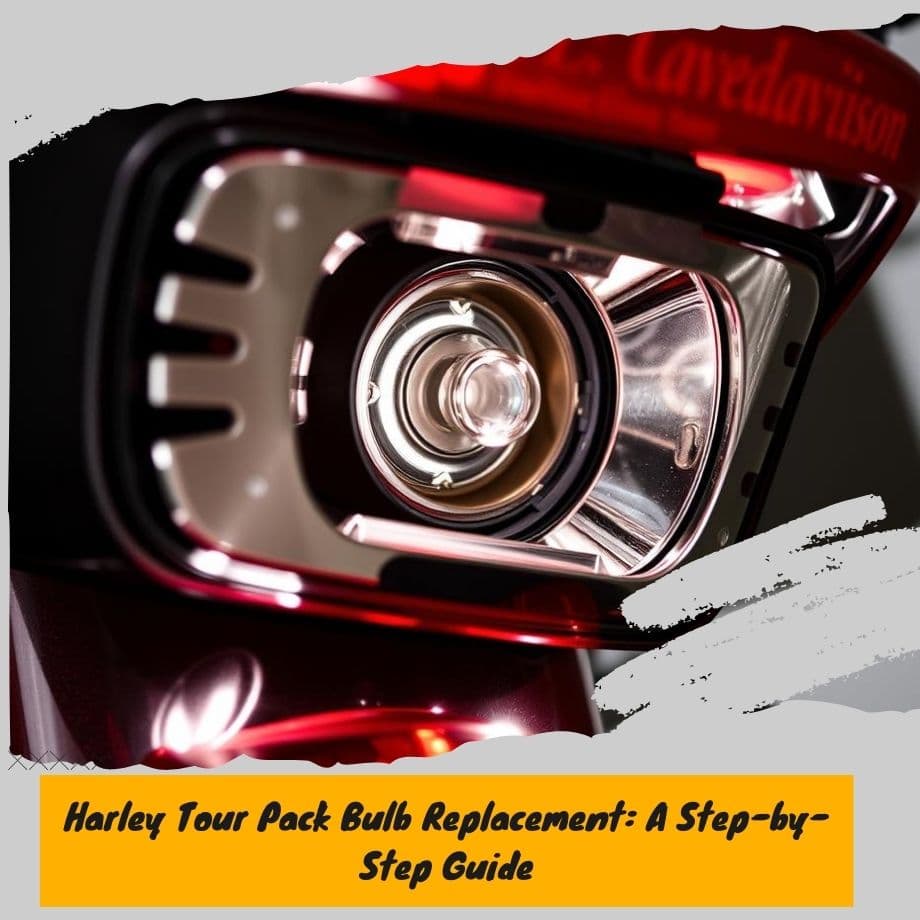
Harley Tour Pack Bulb Replacement: A Step-by-Step Guide
As a Harley-Davidson motorcycle owner, keeping your bike in top shape is key. This includes replacing the tour pack bulbs, which can be tricky for beginners. This guide will help you replace your tour pack bulbs easily.
Replacing bulbs, whether they're burnt out or you want to switch to LEDs, is important. It's a simple task with the right tools and knowledge. We'll cover everything from getting ready to installing the new bulbs, making sure your bike's lights are working great.
Introduction to Harley Tour Pack Bulb Replacement
Before we start, let's talk about why replacing tour pack bulbs is important. It's a basic part of motorcycle care. By following this guide, you'll be able to do it yourself, keeping you safe and visible on the road.
Key Takeaways
- Regular motorcycle maintenance is crucial for safety and visibility
- Harley tour pack bulb replacement is a relatively straightforward process
- Understanding the importance of proper lighting is key
- Upgrading to LEDs can improve visibility and safety
- Following a step-by-step guide can help you perform the replacement process with confidence
- Proper tools and knowledge are necessary for a successful replacement
Understanding Your Harley Tour Pack Lighting System
It's key to know your Harley-Davidson's tour pack lighting system. This lighting is vital for your safety on the road. Knowing the bulb types in your model is crucial for maintenance and replacement.
The bulbs in Harley Tour Packs can be incandescent or LED. Incandescent bulbs are common but can wear out quickly. LED bulbs, on the other hand, last longer and use less energy.
Bulb Types and Failure Reasons
- Incandescent bulbs: prone to wear and tear, overheating, and manufacturing defects
- LED bulbs: offer improved durability and energy efficiency
Knowing your bulb model is important for the right replacement. Understanding bulb types and failure reasons helps in maintaining your lighting. Whether your Harley is new or old, keeping your lighting in check is crucial for your safety.
Essential Safety Precautions Before Starting
When you're working on your motorcycle, motorcycle safety is key. Before you start replacing bulbs, make sure you're taking the right safety precautions. This will help you avoid accidents and make the job easier.
First, find a clean and stable place to work. This keeps you focused and safe. Then, turn off the battery to stop any sudden starts or shocks. Wear gloves and safety glasses to protect yourself from harm.
Here are more safety precautions to remember:
- Check your motorcycle's manual for electrical work safety tips
- Use a torque wrench to avoid stripping screws
- Keep loose clothing and long hair tied back to avoid getting caught
By following these safety precautions, you'll have a safe and successful bulb replacement. Remember, motorcycle safety is very important. Taking the right steps will keep you safe from risks.
Required Tools and Materials for the Job
Replacing a bulb in your Harley Tour Pack needs the right tools and materials. A good tool list makes the job easier and faster. Before starting, make sure you have everything you need to avoid any problems.
A basic tool list for bike maintenance includes a screwdriver set, pliers, and a wrench set. These tools help you remove the outer cover and get to the bulb. You might also need a trim removal tool, depending on your bike's model and the job's complexity.
Basic Tool List
- Screwdriver set
- Pliers
- Wrench set
Optional Specialized Equipment
- Trim removal tool
Choosing replacement bulbs is a personal preference. You can stick with the original type or go for LEDs, which last longer and use less energy. Make sure the bulbs fit your Harley Tour Pack's lighting system. With the right tools and bulbs, you'll replace the bulb successfully.
https://youtube.com/watch?v=JgNmSOU227U
Preparing Your Motorcycle for Harley Tour Pack Bulb Replacement
To replace bulbs smoothly, prepare your motorcycle well. This means a few important steps for better tour pack access. First, place your bike on a flat surface and lock the parking brake. If your bike has a center stand, use it to lift the bike. This makes getting to the tour pack easier.
Then, take off any accessories or luggage that block your way to the tour pack. This motorcycle preparation is key for working efficiently and safely. Clearing the area lets you focus on the task without distractions.
Here are some key points to consider during the preparation phase:
- Ensure the motorcycle is stable and secure.
- Remove any items that may interfere with your access to the tour pack.
- Take note of any specific features or components of your motorcycle that may affect the bulb replacement process.
By following these steps and considering these factors, you'll be well on your way to a successful bulb replacement. Always check your motorcycle's manual for specific instructions. And don't hesitate to seek help if you're unsure about any part of the process.
Accessing the Tour Pack Light Assembly
To get to the tour pack light assembly on your Harley-Davidson, start by removing the outer cover. This means taking out a few screws. Be careful not to damage any parts around it. The tour pack assembly is complex, so pay close attention.
After removing the outer cover, find the bulb housing. It should be easy to see. Be careful not to touch any electrical parts. The wire harness is also important. Damage to it can cause bigger electrical problems. Note how it's connected for easy reinstallation later.
- Remove the outer cover by taking out the screws
- Locate the bulb housing and take note of its position
- Navigate the wire harness carefully to avoid damaging it
By following these steps, you can access the tour pack light assembly. This will help you prepare for the bulb replacement. Remember to be patient and take your time. This process is delicate and requires careful attention.
Step-by-Step Bulb Removal Process
To start the bulb removal process, make sure you have the right tools. Also, understand the tour pack bulb housing well. The aim is to safely remove the wire harness from the bulb without harming other parts.
First, find the wire harness connected to the tour pack bulb. Carefully pull it away from the bulb. This helps avoid damaging the wiring or the bulb housing.
Then, twist and pull the bulb out of its housing. If it's stuck, don't force it. Forcing could damage the housing or the bulb. Use a bulb removal tool to help loosen the bulb instead.
- Disconnecting the wire harness from the bulb
- Gently twisting and pulling the bulb out of its housing
- Avoiding force or pressure that could cause damage
By following these steps and taking your time, you can successfully remove the bulb. This prepares your tour pack for a new bulb installation.
Installing the New Tour Pack Bulb
When you're installing bulbs, it's important to handle them right. This ensures they last a long time. Replacing the tour pack bulb needs careful steps to avoid damage.
Start by holding the new bulb by its base. This keeps the glass clean of fingerprints and dirt. Then, line up the bulb with its spot, making sure it fits right before twisting it in.
Some important tips for proper handling and installation are:
- Hold the bulb by its base to prevent contamination
- Align the bulb with its housing for secure seating
- Twist the bulb into place to ensure a snug fit
After installing, reconnect the wire harness. Make sure it's tight to avoid loose connections. Then, turn on the motorcycle and check the light works well.
By following these steps and handling the bulb correctly, you'll have a safe and reliable tour pack lighting system for your Harley.
Common Installation Challenges and Solutions
Replacing a bulb in your Harley Tour Pack can be tricky. You might find that the connection is loose. To fix this, check the wire harness and make sure all connections are tight. This is key to avoid bigger problems later.
Another problem is if the bulb doesn't fit right. This could mean you picked the wrong type. Always check the bulb model against your Harley's specs. If you still have trouble, getting help from a mechanic is a good idea. They can guide you past any installation challenges.
Some common problems when replacing bulbs include:
- Loose connections
- Incorrect bulb type
- Difficulty accessing the bulb housing
To solve these issues, having the right tools and knowledge is crucial. Being well-prepared and taking your time will help you replace the bulb successfully. This way, you can enjoy riding with your Harley Tour Pack working perfectly.
Often, solving these problems is quite simple. For loose connections, just check the wire harness and tighten any screws. If the bulb doesn't fit, double-check the specs and try again. By being careful and patient, you can overcome any installation challenges and have a successful replacement.
Testing Your Newly Installed Bulb
After installing the new bulb, it's key to do bulb testing to make sure it's working right. This step helps find any problems early, like a bad bulb or wrong install. First, turn on the motorcycle's ignition and see if the light turns on.
To check the brightness verification of the bulb, compare it to the other lights on the motorcycle. Make sure it's not too dim or too bright. This is important to make sure the new bulb is working right.
Here are the steps to follow for bulb testing:
- Turn on the motorcycle's ignition
- Check that the light comes on
- Compare the brightness of the new bulb to the other lights on the motorcycle
By following these steps, you can make sure your new bulb is working right. This ensures the necessary brightness verification for safe riding. Always check your motorcycle's manual for specific bulb testing and maintenance instructions.
Maintenance Tips for Long-Lasting Performance
To keep your Harley Tour Pack's lights working great, regular maintenance tips are key. Check the bulbs often for wear or damage. Clean the lenses to keep visibility clear. Make sure all electrical connections are tight. These steps help your lights last longer and avoid safety risks or expensive fixes.
Some important maintenance tips to remember are:
- Regularly inspecting the bulbs for signs of wear or damage
- Cleaning the lenses to maintain visibility
- Ensuring all electrical connections are secure
By sticking to these maintenance tips, your Harley Tour Pack's lights will perform well for a long time. This keeps you safe and saves money by avoiding expensive repairs. Always handle bulbs carefully to avoid oil from your skin damaging them.
Regular maintenance is crucial for your lighting system's longevity. By keeping up with maintenance tips and ensuring your system works well, you'll enjoy long-lasting performance and peace of mind while riding.
Upgrading to LED Alternatives
Upgrading to LED lights is a smart move for your motorcycle's lighting. This change, known as led conversion, boosts your Harley Tour Pack's lighting. LEDs last longer, are brighter, and more durable than old bulbs.
LEDs use less power and make less heat. This makes them better for the environment and saves money over time. Plus, many LED kits are easy to install, making the upgrade simple for bike owners.
Key Considerations for LED Conversion
- Understanding the installation differences between traditional bulbs and LEDs
- Choosing the right LED-compatible housings or wiring for your Harley Tour Pack
- Ensuring a proper fit and connection to avoid any issues with your lighting system
Thinking about these points helps you get a better lighting system for your bike. The setup might need some extra care, but it's worth it. With the right kit and patience, you can make your Harley Tour Pack shine brighter with LED lights.
Conclusion
Replacing your Harley Tour Pack bulb is easy and makes a big difference in your rides. It's important to keep your motorcycle's lights in good shape. This ensures your safety and helps your bike last longer.
Choosing to replace your bulb with a new one or going for LED technology is up to you. This guide has shown you how to do it. Regular checks and quick bulb swaps keep your Harley's lights working well. This lets you ride safely and confidently.
Now, when you ride, you can feel proud of your Harley's new bulb. You've done something important to keep your bike in top shape. Your next ride will be brighter and safer, thanks to your new skills.
FAQ
What types of bulbs are used in Harley Tour Packs?
Harley Tour Packs use different bulbs, like incandescent and LED. The type needed depends on your Harley-Davidson's year and model.
What are common reasons for Harley Tour Pack bulb failure?
Bulbs fail due to wear, overheating, and defects. Regular checks and maintenance can prevent these problems.
How do I identify the correct replacement bulb for my Harley Tour Pack?
Finding the right bulb is key. Check your motorcycle's manual or ask a Harley-Davidson dealer or mechanic for help.
What safety precautions should I take before starting the Harley Tour Pack bulb replacement?
Make sure your workspace is clean and stable. Disconnect the battery to avoid shocks. Wear gloves and safety glasses.
What tools and materials do I need for the Harley Tour Pack bulb replacement?
You'll need a screwdriver set, pliers, and a wrench set. For some bikes, a trim removal tool might be needed. Also, get the right bulb, which could be the original or an LED upgrade.
How do I prepare my motorcycle for the Harley Tour Pack bulb replacement?
Park your bike on a level surface and apply the parking brake. Use a center stand for better access. Remove any luggage or accessories.
How do I access the Harley Tour Pack light assembly?
Remove the outer cover by taking out screws. Then, find the bulb housing. Be careful with the wire harness to avoid damage.
What is the step-by-step process for removing the old Harley Tour Pack bulb?
Start by disconnecting the wire harness from the bulb. Gently twist and pull the bulb out. If it's stuck, don't force it. Use a bulb removal tool or get professional help.
How do I properly install the new Harley Tour Pack bulb?
Handle the bulb by the base to avoid touching the glass. Align it with the housing and twist it in. Reconnect the wire harness and test the bulb.
What are some common installation challenges I may encounter with the Harley Tour Pack bulb replacement?
Loose connections can be fixed by checking the wire harness. If the bulb doesn't fit, you might have the wrong type. If problems continue, seek a mechanic's help.
How do I test the newly installed Harley Tour Pack bulb?
First, turn on the ignition and check if the light comes on. Then, compare its brightness to the other lights to ensure it's correct.
What maintenance tips can I follow to ensure long-lasting performance of my Harley Tour Pack lighting system?
Regularly check bulbs for wear or damage. Clean the lenses and ensure all connections are secure.
What are the benefits of upgrading to LED alternatives for my Harley Tour Pack?
LEDs are more durable, last longer, and are brighter than traditional bulbs. They also use less power. The installation might need specific LED housings or wiring.

Leave a comment